The Best Chili Recipe Ever: A Hearty, Flavor-Packed Comfort Food
There’s nothing quite like a steaming bowl of homemade chili to warm you up on a chilly day. This **best chili recipe ever** is a crowd-pleaser, combining rich, smoky flavors with a perfect balance of spices and textures. Whether you’re hosting a game day party or simply craving a comforting meal, this chili delivers every time. The secret lies in the blend of ground beef, beans, tomatoes, and a medley of spices that come together to create a dish that’s both hearty and satisfying.
This recipe is not only delicious but also incredibly versatile. You can customize it to suit your taste preferences, whether you like it spicy, mild, or loaded with extra toppings. The aroma of simmering chili will fill your kitchen, creating an inviting atmosphere that’s hard to resist. Plus, it’s a one-pot wonder, making cleanup a breeze. Let’s dive into what makes this **best chili recipe ever** a must-try for any home cook.
Quick Recipe Highlights
- Flavor Profile: A perfect blend of smoky, savory, and slightly spicy flavors with a hint of sweetness from the tomatoes.
- Texture: Hearty and chunky, with tender ground beef, soft beans, and a thick, rich sauce.
- Aroma: Warm and inviting, with notes of cumin, chili powder, and garlic filling the air.
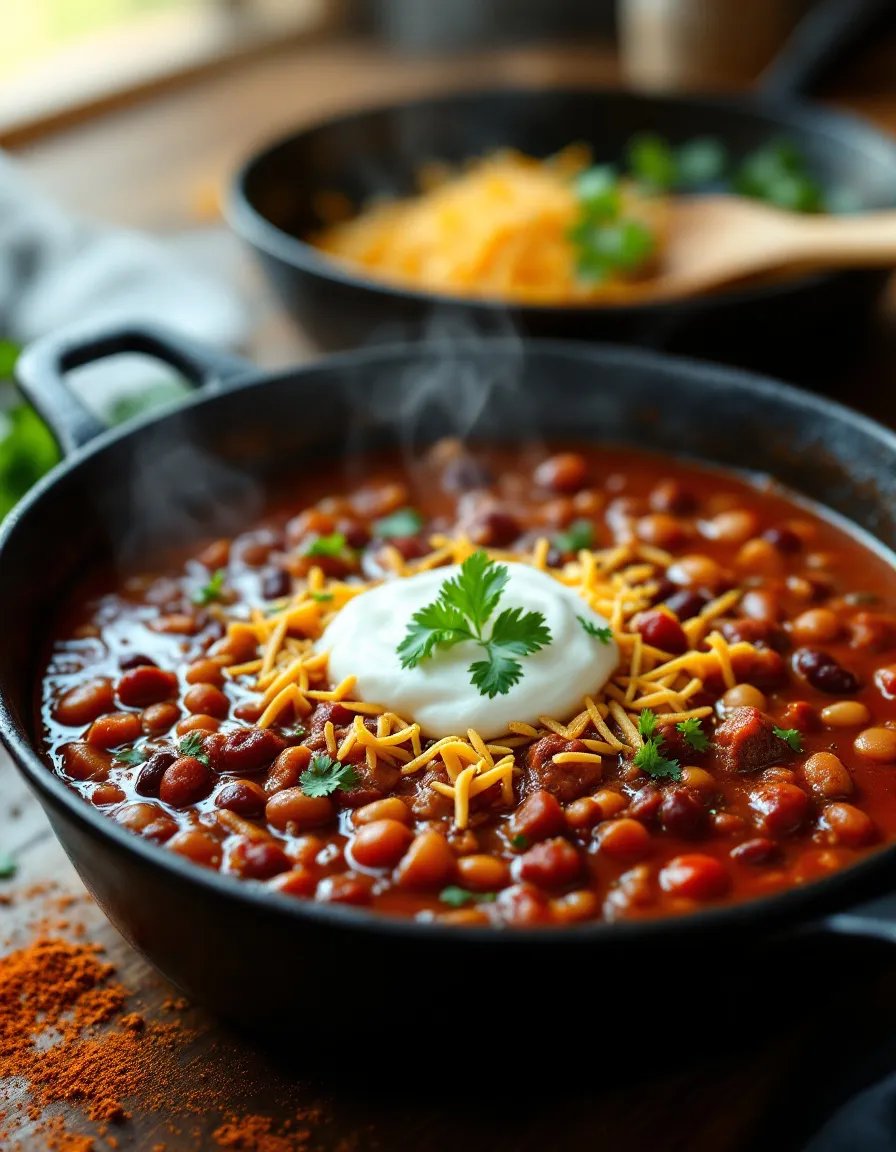
- Visual Appeal: Vibrant red and brown hues, topped with fresh garnishes like cilantro, cheese, and sour cream.
- Skill Level Needed: Beginner-friendly, with simple steps and minimal prep work.
- Special Equipment: A large pot or Dutch oven is all you need to make this chili.
Recipe Overview
- Difficulty Level: This chili recipe is perfect for beginners, requiring basic cooking skills and straightforward techniques.
- Category: A hearty main dish that’s ideal for lunch or dinner.
- Cuisine: A classic American comfort food with influences from Tex-Mex flavors.
- Cost: Budget-friendly, using affordable ingredients like ground beef, beans, and canned tomatoes.
- Season: Perfect for fall and winter, but can be enjoyed year-round.
- Occasion: Great for family dinners, potlucks, or game day gatherings.
Why You’ll Love This Recipe
This **best chili recipe ever** is a winner for so many reasons. First, the taste is unbeatable. The combination of ground beef, beans, and spices creates a rich, savory flavor that’s both comforting and satisfying. The texture is hearty and chunky, making every bite a delight. Plus, the aroma of simmering chili is irresistible, filling your home with warmth and coziness.
Convenience is another big plus. This recipe is a one-pot wonder, meaning less cleanup and more time to enjoy your meal. It’s also incredibly versatile—you can adjust the spice level, swap out ingredients, or add your favorite toppings to make it your own. Whether you’re cooking for a crowd or meal prepping for the week, this chili is a reliable go-to.
Nutritionally, this chili is packed with protein and fiber, thanks to the ground beef and beans. It’s a balanced meal that keeps you full and energized. Plus, it’s easy to make healthier by using lean ground beef or adding extra veggies like bell peppers and zucchini.
Socially, this chili is a hit at any gathering. It’s a crowd-pleaser that appeals to all ages and tastes. Serve it with cornbread, tortilla chips, or a side salad for a complete meal. And let’s not forget the cost-effectiveness—this recipe uses affordable ingredients without sacrificing flavor.
Historical Background and Cultural Significance
Chili has a rich history that dates back to the 19th century, with roots in the American Southwest. It’s believed to have originated in Texas, where it was a staple for cowboys and settlers. The dish was simple, using dried beef, fat, and chili peppers, and was often cooked over an open fire.
Over time, chili evolved to include ingredients like tomatoes, beans, and ground beef, becoming the hearty dish we know today. It gained popularity during the Great Depression, as it was an affordable and filling meal. Today, chili is a beloved comfort food enjoyed across the United States, with regional variations like Cincinnati chili and Texas-style chili.
Chili also holds cultural significance as a symbol of community and togetherness. It’s often served at gatherings, potlucks, and sporting events, bringing people together over a shared love of good food. Whether you’re enjoying a bowl at a family dinner or a tailgate party, chili is more than just a meal—it’s an experience.
Ingredient Deep Dive
**Ground Beef**: The star of this chili, ground beef provides a rich, savory base. Opt for 80/20 ground beef for the best flavor and texture. If you prefer a leaner option, you can use ground turkey or chicken.
**Beans**: Kidney beans and black beans add heartiness and fiber to the chili. They’re also a great source of plant-based protein. If you’re not a fan of beans, you can substitute with lentils or extra veggies.
**Tomatoes**: Canned diced tomatoes and tomato sauce create the base of the chili, adding sweetness and acidity. For a fresher taste, you can use fresh tomatoes when they’re in season.
**Spices**: Chili powder, cumin, and paprika are essential for that signature chili flavor. Adjust the amounts to suit your spice preference. For extra heat, add a pinch of cayenne pepper.
**Onion and Garlic**: These aromatics add depth and complexity to the dish. Be sure to sauté them until they’re soft and fragrant for the best flavor.
Common Mistakes to Avoid
- Overcooking the beef: Cook the ground beef just until it’s browned, as overcooking can make it tough.
- Using too much liquid: Start with less liquid and add more as needed to achieve your desired consistency.
- Skipping the spices: Don’t skimp on the chili powder, cumin, and paprika—they’re key to the flavor.
- Not tasting as you go: Adjust the seasoning throughout the cooking process to ensure a balanced flavor.
- Using old spices: Fresh spices make a big difference in flavor, so check the expiration dates.
- Overloading with beans: While beans are a great addition, too many can overwhelm the dish.
- Forgetting to simmer: Let the chili simmer for at least 30 minutes to allow the flavors to meld.
- Not garnishing: Toppings like cheese, sour cream, and cilantro add texture and flavor.
Essential Techniques
**Browning the Beef**: This step is crucial for developing flavor. Cook the ground beef over medium-high heat until it’s evenly browned, breaking it up into small pieces as it cooks.
**Sautéing the Aromatics**: Onion and garlic are the foundation of the chili’s flavor. Sauté them until they’re soft and fragrant, which takes about 5 minutes.
**Simmering**: Let the chili simmer for at least 30 minutes to allow the flavors to meld and the sauce to thicken. Stir occasionally to prevent sticking.
**Seasoning**: Taste the chili as it cooks and adjust the seasoning as needed. Add salt, pepper, and spices gradually to achieve the perfect balance.
Pro Tips for Perfect Chili
- Use a mix of ground beef and ground pork for extra flavor.
- Add a splash of beer or coffee for depth of flavor.
- Toast the spices in the pot before adding the liquid to enhance their aroma.
- Let the chili rest for 10-15 minutes before serving to allow the flavors to settle.
- Double the recipe and freeze leftovers for an easy meal later.
- Serve with a variety of toppings to let everyone customize their bowl.
Variations and Adaptations
**Regional Variations**: Try Cincinnati-style chili with cinnamon and cocoa powder, or Texas-style chili without beans.
**Seasonal Adaptations**: Add butternut squash in the fall or fresh corn in the summer for a seasonal twist.
**Dietary Modifications**: Make it vegetarian by using plant-based ground meat and extra beans, or go keto by omitting the beans and adding more meat.
**Flavor Variations**: Experiment with different spice blends, like adding smoked paprika or chipotle peppers for a smoky flavor.
**Texture Modifications**: For a smoother chili, blend half of the mixture before serving.
**Presentation Alternatives**: Serve the chili in bread bowls or over baked potatoes for a fun twist.
Serving and Presentation Guide
**Plating Techniques**: Serve the chili in deep bowls to keep it warm and prevent spills.
**Garnishing Ideas**: Top with shredded cheese, sour cream, chopped cilantro, and sliced jalapeños for a pop of color and flavor.
**Traditional Accompaniments**: Cornbread, tortilla chips, and a side salad are classic pairings.
**Modern Serving Suggestions**: Try serving the chili over rice or with a side of avocado slices.
**Temperature Considerations**: Serve the chili hot, but let it cool slightly before adding cold toppings like sour cream.
**Portion Control Tips**: Use smaller bowls for portion control, or serve with a side of veggies to balance the meal.
Wine and Beverage Pairing
**Wine Pairings**: A bold red wine like Zinfandel or Malbec complements the rich flavors of the chili.
**Non-Alcoholic Alternatives**: Iced tea or a citrusy soda like ginger ale are refreshing options.
**Coffee/Tea Pairings**: A dark roast coffee or spiced chai tea pairs well with the smoky flavors.
**Temperature Considerations**: Serve beverages chilled to balance the heat of the chili.
**Serving Suggestions**: Offer a variety of drink options to suit different preferences.
Storage and Shelf Life
**Storage Methods**: Store leftover chili in an airtight container in the refrigerator for up to 4 days.
**Temperature Requirements**: Keep the chili refrigerated at or below 40°F to ensure food safety.
**Container Recommendations**: Use glass or BPA-free plastic containers for best results.
**Signs of Spoilage**: Discard the chili if it develops an off smell, color, or texture.
**Reheating Instructions**: Reheat on the stovetop over medium heat, stirring occasionally, until heated through.
**Freezing Guidelines**: Freeze the chili in portion-sized containers for up to 3 months. Thaw in the refrigerator before reheating.
Make Ahead Strategies
**Prep Timeline**: You can prepare the chili up to 2 days in advance and store it in the refrigerator.
**Storage Between Steps**: Cook the chili as directed, then let it cool completely before storing.
**Quality Impact Assessment**: The flavors will deepen as the chili sits, making it even more delicious.
**Assembly Tips**: Reheat the chili gently on the stovetop, adding a splash of water or broth if needed.
**Reheating Guidelines**: Heat the chili until it’s steaming hot, stirring occasionally.
**Fresh Element Additions**: Add fresh toppings like cilantro and cheese just before serving.
Scaling Instructions
**Halving the Recipe**: Simply halve all the ingredients and follow the same cooking instructions.
**Doubling or Tripling**: Use a larger pot and increase the cooking time slightly to ensure even cooking.
**Equipment Adjustments**: Make sure your pot is large enough to accommodate the increased volume.
**Timing Modifications**: Allow extra time for the chili to simmer and thicken.
**Storage Considerations**: Store any leftovers in the refrigerator or freezer for future meals.
Nutritional Deep Dive
**Macro Breakdown**: This chili is high in protein and fiber, with moderate amounts of fat and carbs.
**Micronutrient Analysis**: It’s a good source of iron, potassium, and vitamin C.
**Health Benefits**: The beans provide plant-based protein and fiber, while the tomatoes offer antioxidants.
**Dietary Considerations**: This recipe can be adapted for gluten-free, dairy-free, and low-carb diets.
**Portion Analysis**: A serving of chili is filling and satisfying, making it a great option for weight management.
**Weight Management Tips**: Pair the chili with a side of veggies or a salad for a balanced meal.
Dietary Adaptations
**Gluten-Free**: This recipe is naturally gluten-free, but check labels on canned goods to be sure.
**Dairy-Free**: Skip the cheese and sour cream, or use dairy-free alternatives.
**Vegan**: Use plant-based ground meat and extra beans, and skip the dairy toppings.
**Low-Carb**: Omit the beans and add extra veggies like zucchini and mushrooms.
**Keto**: Use high-fat ground beef and skip the beans, adding more spices for flavor.
**Paleo**: Use grass-fed beef and skip the beans, adding extra veggies and spices.
**Low-FODMAP**: Use canned lentils instead of beans and omit the onion and garlic.
Troubleshooting Guide
**Texture Issues**: If the chili is too thick, add more broth or water. If it’s too thin, let it simmer longer.
**Flavor Balance**: Adjust the seasoning with salt, pepper, and spices to taste.
**Temperature Problems**: Make sure the chili is heated through before serving.
**Equipment Challenges**: Use a heavy-bottomed pot to prevent burning and ensure even cooking.
**Ingredient Substitutions**: Feel free to swap ingredients based on what you have on hand.
**Timing Concerns**: Allow enough time for the chili to simmer and develop flavor.
Recipe Success Stories
This **best chili recipe ever** has been a hit with countless home cooks. Many readers have shared their success stories, from perfecting the spice level to adding their own creative twists. One reader even won a chili cook-off using this recipe! Others have praised its simplicity and versatility, making it a go-to for busy weeknights and special occasions alike.
Frequently Asked Questions
Can I make this chili in a slow cooker? Yes, simply brown the beef and sauté the aromatics on the stovetop, then transfer everything to a slow cooker and cook on low for 6-8 hours.
Can I freeze the chili? Absolutely! Freeze it in portion-sized containers for up to 3 months.
What’s the best way to reheat chili? Reheat on the stovetop over medium heat, stirring occasionally, until heated through.
Can I use ground turkey instead of beef? Yes, ground turkey works well and is a leaner option.
How can I make the chili spicier? Add extra chili powder, cayenne pepper, or diced jalapeños to taste.
What are the best toppings for chili? Shredded cheese, sour cream, chopped cilantro, and sliced jalapeños are all great options.
Can I make this chili vegetarian? Yes, use plant-based ground meat and extra beans.
How long does chili last in the fridge? Up to 4 days in an airtight container.
Can I use fresh tomatoes instead of canned? Yes, but you may need to adjust the cooking time to allow the fresh tomatoes to break down.
What’s the best way to thicken chili? Let it simmer longer, or add a cornstarch slurry (1 tablespoon cornstarch mixed with 2 tablespoons water).
Additional Resources
For more chili inspiration, check out our guides on **spice blends**, **slow cooker recipes**, and **meal prep tips**. You’ll also find recommendations for the best kitchen tools and ingredient substitutions to make your cooking experience even better.
Join the Conversation
We’d love to hear how your chili turned out! Share your photos and tips on social media using the hashtag #BestChiliEver. Don’t forget to leave a review and let us know your favorite variations. Happy cooking!
The Recipe
The Best Chili Recipe Ever
Serves: 6
Prep Time: 15 mins
Cook Time: 45 mins
Total Time: 60 mins
Kitchen Equipment Needed
- Large pot or Dutch oven
- Wooden spoon
- Knife and cutting board
- Measuring cups and spoons
Ingredients
- 1 lb ground beef
- 1 medium onion, diced
- 3 cloves garlic, minced
- 1 can (15 oz) kidney beans, drained and rinsed
- 1 can (15 oz) black beans, drained and rinsed
- 1 can (15 oz) diced tomatoes
- 1 can (8 oz) tomato sauce
- 2 tbsp chili powder
- 1 tsp cumin
- 1 tsp paprika
- 1/2 tsp salt
- 1/4 tsp black pepper
- 1 cup beef broth
Directions
- In a large pot, brown the ground beef over medium-high heat, breaking it up into small pieces as it cooks.
- Add the diced onion and minced garlic, and sauté until softened, about 5 minutes.
- Stir in the chili powder, cumin, paprika, salt, and black pepper, and cook for 1-2 minutes until fragrant.
- Add the kidney beans, black beans, diced tomatoes, tomato sauce, and beef broth. Stir to combine.
- Bring the chili to a boil, then reduce the heat to low and let it simmer for 30 minutes, stirring occasionally.
- Taste and adjust seasoning as needed. Serve hot with your favorite toppings.
Recipe Notes
- For extra heat, add a pinch of cayenne pepper or diced jalapeños.
- This chili tastes even better the next day, so feel free to make it ahead of time.
- Freeze leftovers in portion-sized containers for up to 3 months.


