Butterfinger Balls: A Perfect Sweet Treat
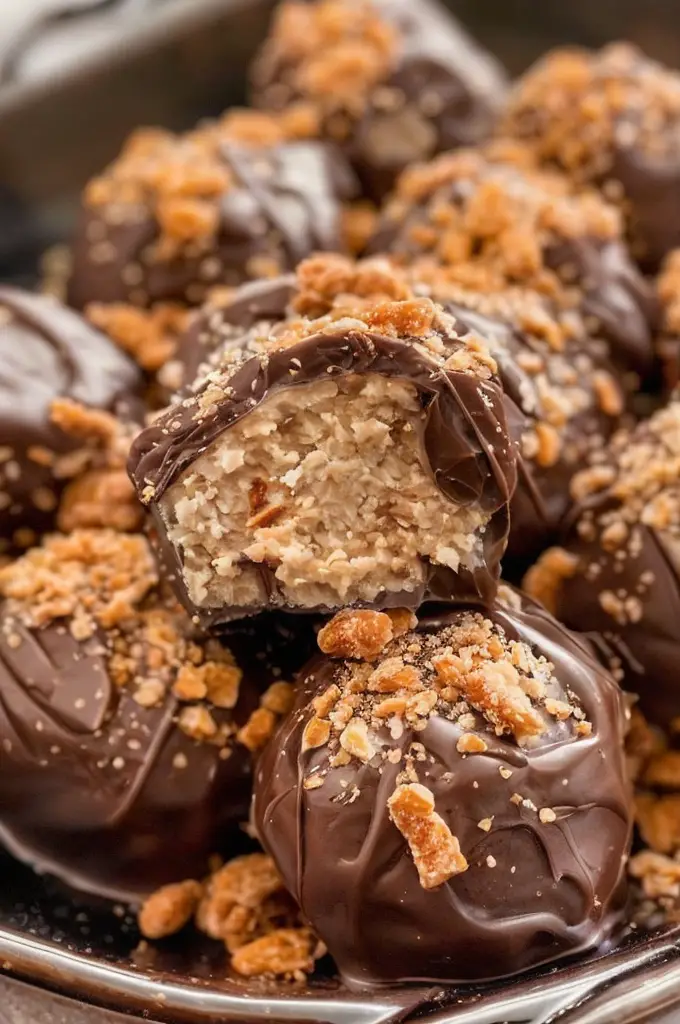
Indulge in the irresistible flavors of Butterfinger Balls, a spectacular sweet treat that’s sure to delight your taste buds. This simple, no-bake recipe combines the crunchy, chocolaty goodness of a classic candy bar with a creamy, decadent texture that’s perfect for any occasion.
Why You’ll Love This Recipe
Butterfinger Balls are a unique and delightful dessert that combines the rich taste of chocolate with the satisfying crunch of Butterfinger candy. These bite-sized treats are perfect for parties, potlucks, or a simple indulgence at home. Plus, they are incredibly easy to make, requiring no baking and only a handful of ingredients.
One of the standout features of this recipe is its versatility. You can easily customize the recipe to include other favorite candies or even add a hint of peanut butter for extra flavor. These Butterfinger Balls are truly a crowd-pleaser that can brighten up any occasion.
Whether you’re looking for a quick dessert or a special treat to share with friends, Butterfinger Balls are a delicious and convenient option. Their unique texture and mouthwatering taste make them an unforgettable treat that everyone will love.
Context/Background
Butterfinger Balls are inspired by the beloved Butterfinger candy bar, a cherished treat that’s been a favorite for nearly a century. The candy bar’s signature crunchy peanut butter core coated in milk chocolate makes it an ideal candidate for transformation into this delightful no-bake dessert.
This recipe encapsulates the spirit of fun and ease that characterizes many no-bake treats. With a rich history rooted in American confectionery tradition, Butterfinger Balls bring a modern twist to a time-honored favorite, making it accessible and enjoyable for everyone to create and savor.
Recipe Details
Serves: 24
Prep Time: 15 mins
Cook Time: 0 mins
Total Time: 15 mins
Ingredients
- 1 cup crushed Butterfinger candy bars
- 1 cup creamy peanut butter
- 2 cups powdered sugar
- 1/4 cup unsalted butter, softened
- 1 teaspoon vanilla extract
- 12 ounces semi-sweet chocolate chips
- 1 tablespoon coconut oil
Directions
- In a large mixing bowl, combine the crushed Butterfinger candy, peanut butter, powdered sugar, softened butter, and vanilla extract. Mix until well combined and a dough forms.
- Roll the mixture into 1-inch balls and place them on a baking sheet lined with parchment paper. Refrigerate for 30 minutes to firm.
- In a microwave-safe bowl, combine the chocolate chips and coconut oil. Microwave in 30-second intervals, stirring in between, until fully melted and smooth.
- Dip each ball into the melted chocolate, allowing the excess to drip off. Return each coated ball to the parchment-lined sheet.
- Chill the Butterfinger Balls in the refrigerator until the chocolate is set, about 15 minutes.
Tips for Perfect Butterfinger Balls
- Ensure the peanut butter mixture is thoroughly combined to prevent crumbling.
- Use a toothpick or fork to dip the balls into the chocolate for a smooth coating.
- Chill the balls before coating to help them hold their shape during dipping.
- Store the finished treats in the refrigerator to maintain freshness and texture.
Serving Suggestions
Serve Butterfinger Balls as part of a dessert platter alongside other no-bake treats for a delightful variety. They are also perfect as a sweet snack with coffee or tea.
Storage and Leftovers
Store Butterfinger Balls in an airtight container in the refrigerator for up to a week. For longer storage, freeze them in a freezer-safe container for up to 3 months. Allow frozen balls to thaw in the refrigerator before serving.
Final Thoughts
Butterfinger Balls are a delightful, easy-to-make treat that is sure to be a hit with everyone who tries them. Their combination of flavors and simple preparation make them an excellent option for any dessert lover looking to enjoy a taste of nostalgia.
Recipe Notes
- Swap out semi-sweet chocolate chips for dark or milk chocolate to suit your taste preference.
- For an extra flair, sprinkle crushed Butterfinger over the dipped balls before the chocolate sets.
- Add a small amount of sea salt on top for a sweet-salty contrast.

