Milk Chocolate Peanut Butter Pie: A Decadent Dessert for Every Occasion
Indulge in the ultimate dessert experience with this creamy and decadent Milk Chocolate Peanut Butter Pie. Perfect for any occasion, this pie combines the rich, velvety texture of milk chocolate with the nutty, savory flavor of peanut butter, creating a dessert that’s impossible to resist. Whether you’re hosting a dinner party or simply treating yourself, this pie is sure to impress.
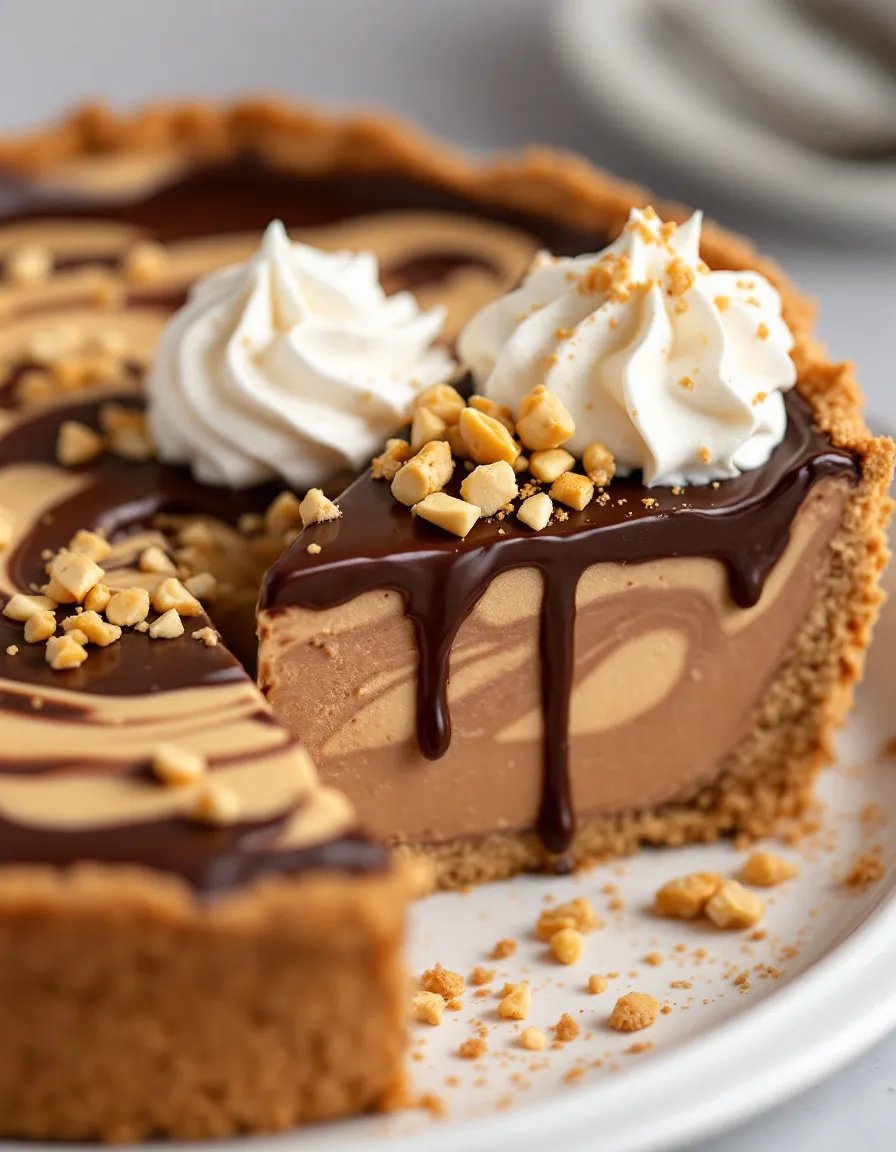
The combination of smooth milk chocolate and creamy peanut butter creates a harmonious balance of flavors that will delight your taste buds. The buttery graham cracker crust adds a satisfying crunch, while the whipped cream topping provides a light and airy finish. This pie is not only delicious but also visually stunning, making it a show-stopping centerpiece for any dessert table.
Quick Recipe Highlights
- Flavor Profile: A perfect blend of rich milk chocolate and creamy peanut butter, with a hint of sweetness from the whipped cream topping.
- Texture: Smooth and velvety filling with a crunchy graham cracker crust and a light, airy whipped cream topping.
- Aroma: The enticing aroma of melted chocolate and roasted peanuts will fill your kitchen as you prepare this pie.
- Visual Appeal: The pie’s glossy chocolate surface, topped with swirls of whipped cream and a sprinkle of crushed peanuts, is a feast for the eyes.
- Skill Level Needed: This recipe is beginner-friendly, requiring only basic baking skills and common kitchen tools.
- Special Equipment: You’ll need a 9-inch pie dish, a mixing bowl, and an electric mixer for the whipped cream.
Recipe Overview
- Difficulty Level: This Milk Chocolate Peanut Butter Pie is easy to make, with straightforward steps and minimal baking required. It’s perfect for novice bakers and experienced chefs alike.
- Category: Dessert
- Cuisine: American
- Cost: This pie is budget-friendly, with most ingredients being pantry staples or easily accessible at your local grocery store.
- Season: This pie is perfect year-round, but it’s especially comforting during the cooler months when rich, indulgent desserts are most appreciated.
- Occasion: Ideal for holidays, birthdays, dinner parties, or as a special treat for yourself.
Why You’ll Love This Recipe
This Milk Chocolate Peanut Butter Pie is a dessert lover’s dream. The combination of milk chocolate and peanut butter is a classic pairing that never fails to satisfy. The smooth, creamy filling is rich and indulgent, while the graham cracker crust adds a delightful crunch. The whipped cream topping provides a light contrast to the dense filling, making each bite a perfect balance of textures.
One of the best things about this pie is how easy it is to make. With just a few simple steps, you can create a dessert that looks and tastes like it came from a professional bakery. The recipe requires no baking for the filling, making it a great option for those who want to avoid turning on the oven. Plus, it’s a versatile dessert that can be customized to suit your preferences.
From a nutritional standpoint, this pie offers a good source of protein from the peanut butter, and the milk chocolate provides a dose of antioxidants. While it’s certainly a treat, you can feel good about indulging in a dessert that has some nutritional benefits. Additionally, the pie can be made ahead of time, making it a convenient option for busy hosts.
The social and entertaining value of this pie cannot be overstated. It’s a crowd-pleaser that will have your guests coming back for seconds. The pie’s elegant presentation makes it a great centerpiece for any dessert table, and it’s sure to spark conversation and compliments. Whether you’re serving it at a formal dinner party or a casual family gathering, this pie is guaranteed to impress.
Finally, this pie is cost-effective and accessible. The ingredients are affordable and easy to find, making it a great option for those on a budget. You don’t need any special equipment or hard-to-find ingredients to create this delicious dessert. With just a few simple steps, you can enjoy a dessert that tastes like a million bucks without breaking the bank.
Historical Background and Cultural Significance
The combination of chocolate and peanut butter is a beloved pairing in American cuisine, with roots that can be traced back to the early 20th century. The invention of peanut butter in the late 1800s and the subsequent rise of chocolate as a popular ingredient in desserts led to the creation of many iconic treats, including the peanut butter cup and, eventually, the peanut butter pie.
Peanut butter pies became particularly popular in the mid-20th century, as home bakers began experimenting with new ways to incorporate peanut butter into their desserts. The addition of chocolate to these pies was a natural progression, as the two flavors complement each other perfectly. Over time, the Milk Chocolate Peanut Butter Pie has become a staple in American dessert culture, enjoyed by families and friends across the country.
The evolution of this recipe has seen many variations, with some bakers opting for dark chocolate or adding additional ingredients like caramel or bananas. However, the classic combination of milk chocolate and peanut butter remains a favorite, cherished for its simplicity and timeless appeal. This pie is a testament to the enduring popularity of these two ingredients and their ability to create a dessert that is both comforting and indulgent.
Ingredient Deep Dive
Milk Chocolate
Milk chocolate is the star of this pie, providing a rich, creamy base for the filling. Made from cocoa solids, milk, and sugar, milk chocolate has a sweeter, milder flavor compared to dark chocolate. When selecting milk chocolate for this recipe, opt for a high-quality brand with a high cocoa content for the best flavor. Store milk chocolate in a cool, dry place to prevent it from melting or developing a white bloom.
Peanut Butter
Peanut butter adds a nutty, savory flavor to the pie, balancing the sweetness of the milk chocolate. Choose a creamy, natural peanut butter without added sugars or oils for the best results. Peanut butter is a good source of protein and healthy fats, making it a nutritious addition to this dessert. Store peanut butter in a cool, dry place, and stir well before using if it has separated.
Graham Crackers
Graham crackers form the base of the pie crust, providing a sweet, crunchy contrast to the creamy filling. Made from whole wheat flour, sugar, and honey, graham crackers have a distinct flavor that pairs well with the chocolate and peanut butter. For a gluten-free option, you can use gluten-free graham crackers or substitute with another type of cookie crust.
Whipped Cream
Whipped cream is used as a topping for the pie, adding a light, airy finish to the rich filling. Made from heavy cream and sugar, whipped cream is easy to make at home with an electric mixer. For a dairy-free option, you can use coconut cream or a store-bought whipped topping. Store whipped cream in the refrigerator and use it within a few days for the best texture.
Common Mistakes to Avoid
- Overmixing the filling: Overmixing can cause the filling to become too dense. Mix just until the ingredients are combined.
- Using low-quality chocolate: The quality of the chocolate will greatly affect the flavor of the pie. Opt for a high-quality milk chocolate.
- Not chilling the pie long enough: The pie needs time to set in the refrigerator. Be patient and allow it to chill for at least 4 hours.
- Overbaking the crust: The crust should be golden brown, not burnt. Keep an eye on it while baking.
- Using natural peanut butter without stirring: Natural peanut butter can separate, so be sure to stir it well before using.
- Overwhipping the cream: Overwhipped cream can become grainy. Stop whipping once stiff peaks form.
- Not letting the pie come to room temperature before serving: Letting the pie sit at room temperature for 10-15 minutes before serving will make it easier to slice.
- Using a pie dish that’s too small: A 9-inch pie dish is ideal for this recipe. Using a smaller dish can cause the filling to overflow.
Essential Techniques
Melting Chocolate
Melting chocolate is a key step in this recipe. To avoid burning the chocolate, use a double boiler or microwave it in short bursts, stirring frequently. The chocolate should be smooth and glossy when melted.
Making a Graham Cracker Crust
A graham cracker crust is easy to make by combining crushed graham crackers with melted butter and sugar. Press the mixture firmly into the pie dish to create a solid base.
Whipping Cream
Whipping cream is a simple technique that requires an electric mixer. Start with cold cream and beat until stiff peaks form. Be careful not to overbeat, as this can cause the cream to separate.
Pro Tips for Perfect Milk Chocolate Peanut Butter Pie
- Use room temperature ingredients for easier mixing.
- Chill the pie for at least 4 hours to ensure it sets properly.
- Garnish with crushed peanuts or chocolate shavings for added texture and visual appeal.
- Use a springform pan for easier slicing and serving.
- Let the pie sit at room temperature for 10-15 minutes before serving for easier slicing.
- Use a high-quality milk chocolate for the best flavor.
- Stir natural peanut butter well before using to ensure a smooth consistency.
- Use a piping bag to create decorative swirls with the whipped cream topping.
Variations and Adaptations
Regional Variations
In the South, some bakers add a layer of caramel to the pie for a twist on the classic recipe. In the Midwest, it’s common to add a layer of banana slices for a banana peanut butter chocolate pie.
Seasonal Adaptations
For a festive touch, add crushed peppermint candies to the crust during the holiday season. In the summer, top the pie with fresh berries for a refreshing contrast.
Dietary Modifications
For a gluten-free version, use gluten-free graham crackers or a nut-based crust. For a vegan option, use dairy-free chocolate and coconut cream for the whipped topping.
Flavor Variations
Experiment with different types of chocolate, such as dark or white chocolate, for a unique twist. You can also add a layer of caramel or marshmallow fluff for added flavor.
Texture Modifications
For a crunchier texture, add chopped peanuts or chocolate chips to the filling. For a smoother texture, blend the filling until completely smooth before pouring it into the crust.
Presentation Alternatives
Instead of a traditional pie, you can make individual mini pies or tartlets for a more elegant presentation. You can also serve the pie in a glass trifle dish for a layered dessert.
Serving and Presentation Guide
Plating Techniques
Serve each slice on a dessert plate with a dollop of whipped cream and a sprinkle of crushed peanuts. For a more elegant presentation, drizzle chocolate sauce over the top.
Garnishing Ideas
Garnish the pie with chocolate shavings, crushed peanuts, or fresh berries. You can also add a sprig of mint for a pop of color.
Traditional Accompaniments
Serve the pie with a scoop of vanilla ice cream or a drizzle of caramel sauce for added indulgence.
Modern Serving Suggestions
For a modern twist, serve the pie with a side of espresso or a glass of dessert wine. You can also pair it with a fruit compote for a refreshing contrast.
Temperature Considerations
The pie is best served chilled, but let it sit at room temperature for 10-15 minutes before serving for easier slicing.
Portion Control Tips
Cut the pie into smaller slices for a lighter dessert option. You can also serve it with a side of fresh fruit to balance the richness.
Wine and Beverage Pairing
Wine Pairings
Pair the pie with a sweet dessert wine like Port or Moscato. The sweetness of the wine will complement the rich flavors of the pie.
Non-Alcoholic Alternatives
For a non-alcoholic option, serve the pie with a glass of cold milk or a creamy hot chocolate.
Coffee/Tea Pairings
A cup of freshly brewed coffee or a rich espresso pairs beautifully with the chocolate and peanut butter flavors. For tea lovers, a chai latte or black tea with milk is a great choice.
Temperature Considerations
Serve the pie with a cold beverage to balance the richness of the dessert. A chilled glass of milk or iced coffee is a perfect match.
Serving Suggestions
For a complete dessert experience, serve the pie with a selection of cheeses and fruits. The contrast of flavors and textures will elevate the dessert.
Storage and Shelf Life
Storage Methods
Store the pie in the refrigerator, covered with plastic wrap or in an airtight container. It will keep for up to 3 days.
Temperature Requirements
The pie should be kept chilled at all times to maintain its texture and prevent the filling from becoming too soft.
Container Recommendations
Use a pie carrier or a cake dome to protect the pie and keep it fresh. If using plastic wrap, be sure to cover the pie tightly to prevent it from absorbing odors from the refrigerator.
Signs of Spoilage
If the pie develops an off smell or the filling becomes watery, it’s time to discard it. Always check for signs of mold or discoloration before serving.
Reheating Instructions
The pie is best served cold, but if you prefer it slightly warmed, let it sit at room temperature for 10-15 minutes before serving.
Freezing Guidelines
The pie can be frozen for up to 1 month. Wrap it tightly in plastic wrap and aluminum foil before freezing. Thaw in the refrigerator before serving.
Make Ahead Strategies
Prep Timeline
You can prepare the crust and filling up to 2 days in advance. Assemble the pie the day you plan to serve it for the best texture.
Storage Between Steps
Store the crust and filling separately in the refrigerator until ready to assemble. The whipped cream should be made fresh before serving.
Quality Impact Assessment
Making the pie ahead of time allows the flavors to meld, resulting in a richer, more cohesive dessert. However, the whipped cream should be added just before serving to maintain its texture.
Assembly Tips
Assemble the pie in the morning if serving it in the evening. This allows enough time for the pie to set without compromising the freshness of the whipped cream.
Reheating Guidelines
The pie is best served cold, so there’s no need to reheat it. Simply let it sit at room temperature for 10-15 minutes before serving.
Fresh Element Additions
Add the whipped cream and any garnishes just before serving to ensure they remain fresh and visually appealing.
Scaling Instructions
Halving the Recipe
To make a smaller pie, simply halve the ingredients and use a 6-inch pie dish. The baking time for the crust may be slightly shorter, so keep an eye on it.
Doubling or Tripling
For a larger crowd, double or triple the recipe and use multiple pie dishes. Be sure to adjust the baking time for the crust accordingly.
Equipment Adjustments
If scaling up, you may need a larger mixing bowl and a more powerful mixer to handle the increased volume of ingredients.
Timing Modifications
When scaling the recipe, the chilling time remains the same. Allow at least 4 hours for the pie to set, regardless of the size.
Storage Considerations
If making multiple pies, store them in the refrigerator, covered, until ready to serve. You can also freeze any leftovers for future enjoyment.
Nutritional Deep Dive
Macro Breakdown
This pie is rich in fats and carbohydrates, with a moderate amount of protein from the peanut butter. Each slice contains approximately 400 calories, with 25g of fat, 35g of carbohydrates, and 8g of protein.
Micronutrient Analysis
The pie provides a good source of vitamin E from the peanut butter, as well as small amounts of calcium and iron from the milk chocolate.
Health Benefits
While this pie is a treat, the peanut butter provides healthy fats and protein, and the milk chocolate contains antioxidants. Enjoy in moderation as part of a balanced diet.
Dietary Considerations
This pie is not suitable for those with nut allergies or lactose intolerance. However, it can be adapted to meet various dietary needs with the right substitutions.
Portion Analysis
A standard serving size is one slice, which is about 1/8 of the pie. For a lighter option, consider cutting the pie into smaller slices.
Weight Management Tips
To enjoy this pie while managing your weight, pair it with a light meal and incorporate physical activity into your routine. Moderation is key.
Dietary Adaptations
Gluten-Free
Use gluten-free graham crackers or a nut-based crust to make this pie gluten-free. Ensure all other ingredients are certified gluten-free.
Dairy-Free
Substitute the milk chocolate with dairy-free chocolate and use coconut cream for the whipped topping. Ensure the graham crackers are dairy-free as well.
Vegan
Use dairy-free chocolate, coconut cream, and a vegan graham cracker crust. You can also use a plant-based butter substitute in the crust.
Low-Carb
Use a low-carb crust made from almond flour and sweeten the filling with a low-carb sweetener like erythritol.
Keto
Follow the low-carb adaptations and use a keto-friendly chocolate. Be mindful of the peanut butter, as some brands contain added sugars.
Paleo
Use a paleo-friendly crust made from nuts and dates, and sweeten the filling with honey or maple syrup. Use dark chocolate with a high cocoa content.
Low-FODMAP
Use a low-FODMAP crust made from gluten-free oats and ensure the peanut butter is free from high-FODMAP ingredients like honey or high-fructose corn syrup.
Other Specific Diets
For other dietary needs, consult with a nutritionist to determine the best substitutions and adaptations for this recipe.
Troubleshooting Guide
Texture Issues
If the filling is too runny, it may not have been chilled long enough. Allow it to set in the refrigerator for at least 4 hours. If the crust is too crumbly, press it more firmly into the pie dish.
Flavor Balance
If the pie is too sweet, reduce the amount of sugar in the filling. If it’s not sweet enough, add a bit more sugar or use a sweeter chocolate.
Temperature Problems
If the pie is too soft, it may not have been chilled long enough. Allow it to set in the refrigerator for at least 4 hours. If it’s too hard, let it sit at room temperature for 10-15 minutes before serving.
Equipment Challenges
If you don’t have an electric mixer, you can whip the cream by hand with a whisk, though it will take more time and effort. If you don’t have a pie dish, you can use a springform pan or a deep cake pan.
Ingredient Substitutions
If you don’t have graham crackers, you can use digestive biscuits or another type of cookie for the crust. If you don’t have milk chocolate, you can use dark or semi-sweet chocolate, adjusting the sweetness as needed.
Timing Concerns
If you’re short on time, you can use a store-bought graham cracker crust and pre-made whipped topping. However, the homemade versions will provide a better flavor and texture.
Recipe Success Stories
Community Feedback
Many home bakers have shared their success stories with this recipe, praising its simplicity and delicious results. One reader mentioned that it was the hit of their holiday party, with guests asking for the recipe.
Variation Successes
Some readers have experimented with different types of chocolate, such as dark or white chocolate, and reported excellent results. Others have added layers of caramel or marshmallow fluff for a unique twist.
Adaptation Stories
A vegan reader shared their adaptation of the recipe, using dairy-free chocolate and coconut cream. They were thrilled with the results and said it was just as delicious as the original.
Reader Suggestions
Several readers suggested garnishing the pie with fresh berries or a drizzle of caramel sauce for added flavor and visual appeal. Others recommended serving it with a scoop of vanilla ice cream.
Photography Tips
For the best photos, shoot the pie in natural light and use a neutral background. Garnish with fresh berries or chocolate shavings for added texture and color.
Frequently Asked Questions
Can I use dark chocolate instead of milk chocolate?
Yes, you can use dark chocolate for a richer, less sweet flavor. Adjust the sweetness of the filling as needed.
Can I make this pie ahead of time?
Yes, you can prepare the crust and filling up to 2 days in advance. Assemble the pie the day you plan to serve it for the best texture.
How long does the pie need to chill?
The pie should chill in the refrigerator for at least 4 hours to set properly. Overnight is ideal for the best results.
Can I freeze this pie?
Yes, the pie can be frozen for up to 1 month. Wrap it tightly in plastic wrap and aluminum foil before freezing. Thaw in the refrigerator before serving.
Can I use a store-bought crust?
Yes, you can use a store-bought graham cracker crust to save time. However, the homemade crust will provide a better flavor and texture.
How do I prevent the crust from becoming soggy?
To prevent the crust from becoming soggy, make sure it’s fully baked and cooled before adding the filling. You can also brush the crust with a thin layer of melted chocolate to create a barrier.
Can I use natural peanut butter?
Yes, you can use natural peanut butter, but be sure to stir it well before using to ensure a smooth consistency.
How do I store leftovers?
Store leftovers in the refrigerator, covered with plastic wrap or in an airtight container. The pie will keep for up to 3 days.
Can I make this pie gluten-free?
Yes, you can use gluten-free graham crackers or a nut-based crust to make this pie gluten-free. Ensure all other ingredients are certified gluten-free.
Can I use a different type of nut butter?
Yes, you can use almond butter or cashew butter as a substitute for peanut butter. The flavor will be slightly different, but still delicious.
Additional Resources
Related Recipes
If you enjoyed this Milk Chocolate Peanut Butter Pie, you might also like our Classic Chocolate Mousse or our Salted Caramel Brownies. Both recipes are rich, indulgent, and perfect for any occasion.
Technique Guides
For more tips on melting chocolate, making a perfect graham cracker crust, or whipping cream, check out our comprehensive technique guides. These resources will help you master the skills needed to create this and other delicious desserts.
Ingredient Information
Learn more about the ingredients used in this recipe, including the history of chocolate, the nutritional benefits of peanut butter, and the best types of graham crackers to use. Our ingredient guides provide in-depth information to help you make informed choices.
Equipment Recommendations
If you’re looking to upgrade your kitchen tools, check out our recommendations for the best pie dishes, mixers, and other essential equipment. Having the right tools can make all the difference in your baking success.
Seasonal Variations
Explore our seasonal variations for this pie, including holiday-inspired twists and summer-friendly adaptations. These ideas will help you keep your dessert repertoire fresh and exciting all year round.
Join the Conversation
We love hearing from our readers! Share your experience with this Milk Chocolate Peanut Butter Pie on social media using the hashtag #ChocolatePeanutButterPie. Don’t forget to tag us in your photos and leave a review on our website. Your feedback helps us create even better recipes for you to enjoy.
The Recipe
Milk Chocolate Peanut Butter Pie
Serves: 8
Prep Time: 20 mins
Cook Time: 10 mins
Total Time: 30 mins
Kitchen Equipment Needed
- 9-inch pie dish
- Mixing bowls
- Electric mixer
- Spatula
- Measuring cups and spoons
Ingredients
- 1 1/2 cups graham cracker crumbs
- 1/4 cup granulated sugar
- 1/2 cup unsalted butter, melted
- 1 cup creamy peanut butter
- 8 oz milk chocolate, chopped
- 1 cup heavy cream
- 1/4 cup powdered sugar
- 1 tsp vanilla extract
- 1/2 cup crushed peanuts (for garnish)
Directions
- Preheat your oven to 350°F (175°C).
- In a mixing bowl, combine the graham cracker crumbs, granulated sugar, and melted butter. Press the mixture firmly into the bottom and sides of a 9-inch pie dish.
- Bake the crust for 10 minutes, then remove from the oven and let it cool completely.
- In a microwave-safe bowl, melt the milk chocolate in 30-second intervals, stirring until smooth. Let it cool slightly.
- In a separate bowl, mix the peanut butter with the melted chocolate until well combined. Pour the mixture into the cooled crust and spread it evenly.
- In another bowl, whip the heavy cream with the powdered sugar and vanilla extract until stiff peaks form. Spread the whipped cream over the peanut butter layer.
- Garnish with crushed peanuts and refrigerate the pie for at least 4 hours, or until set.
- Serve chilled and enjoy!
Recipe Notes
- For a gluten-free version, use gluten-free graham crackers.
- You can use dark or semi-sweet chocolate for a richer flavor.
- Store leftovers in the refrigerator for up to 3 days.