Learn How to Make Cannoli: A Classic Italian Dessert with Crispy Shells and Creamy Filling
Cannoli are a beloved Italian dessert that combines crispy, golden shells with a rich, creamy filling. These iconic pastries are perfect for special occasions or as a sweet treat to enjoy with coffee. The contrast between the crunchy shell and the smooth, sweet ricotta filling is simply irresistible. Whether you’re a seasoned baker or a beginner, this easy cannoli recipe will guide you through the process of creating this classic dessert at home.
The beauty of cannoli lies in their simplicity and versatility. You can customize the filling with chocolate chips, candied fruit, or a hint of citrus zest. The shells, made from a simple dough, are fried to perfection and filled just before serving to maintain their crispiness. This recipe ensures that every bite is a delightful balance of textures and flavors, making it a crowd-pleaser for any gathering.
Quick Recipe Highlights
- Flavor Profile: Sweet and creamy ricotta filling with a hint of vanilla and citrus, encased in a crispy, slightly sweet shell.
- Texture: Crunchy on the outside, smooth and creamy on the inside.
- Aroma: Fragrant with vanilla and citrus, with a hint of fried pastry.
- Visual Appeal: Golden-brown shells dusted with powdered sugar, often garnished with pistachios or chocolate chips.
- Skill Level Needed: Intermediate, with some experience in dough handling and frying.
- Special Equipment: Cannoli tubes for shaping the shells, a deep fryer or heavy-bottomed pot, and a pastry bag for filling.
Recipe Overview
- Difficulty Level: This recipe is intermediate due to the need for precise dough rolling and frying techniques. However, with careful attention, even beginners can achieve great results.
- Category: Dessert
- Cuisine: Italian, with roots in Sicilian tradition.
- Cost: Moderate, with most ingredients being pantry staples. Ricotta and cannoli tubes may require a trip to a specialty store.
- Season: Perfect year-round, but especially popular during holidays and celebrations.
- Occasion: Ideal for parties, holidays, or as a special treat with coffee or dessert wine.
Why You’ll Love This Recipe
Cannoli are a dessert that combines simplicity with elegance. The crispy shells and creamy filling create a delightful contrast that is both satisfying and indulgent. This recipe breaks down the process into manageable steps, making it accessible even for those new to Italian baking. The result is a dessert that looks and tastes like it came from a professional bakery.
One of the best things about making cannoli at home is the ability to customize the filling. Whether you prefer classic ricotta with a hint of vanilla or want to experiment with chocolate chips, candied fruit, or citrus zest, the possibilities are endless. This recipe also allows you to control the sweetness and texture, ensuring that every bite is perfect.
From a nutritional perspective, cannoli can be enjoyed in moderation as part of a balanced diet. Ricotta cheese provides a good source of protein and calcium, while the shells offer a satisfying crunch. By making them at home, you can also adjust the ingredients to suit dietary preferences or restrictions.
Cannoli are not just a dessert; they are a social experience. Sharing a plate of freshly made cannoli with friends and family creates lasting memories. The process of making them can also be a fun group activity, especially when it comes to filling and garnishing the shells.
Finally, this recipe is cost-effective and accessible. Most of the ingredients are pantry staples, and the process, while requiring some attention to detail, is straightforward. With a little practice, you’ll be able to whip up a batch of cannoli that rivals those from your favorite Italian bakery.
Historical Background and Cultural Significance
Cannoli have a rich history that dates back to Sicily, where they were originally made as a treat during Carnevale celebrations. The name “cannoli” means “little tubes” in Italian, referring to the shape of the pastry shells. Traditionally, the shells were made by rolling dough around cane stalks before frying, a technique that has evolved over time.
In Sicilian culture, cannoli are more than just a dessert; they are a symbol of celebration and tradition. They are often served at weddings, holidays, and other special occasions. The filling, typically made with ricotta cheese, reflects the agricultural heritage of the region, where dairy farming is prominent.
Over the years, cannoli have gained popularity worldwide, with variations emerging in different regions. In the United States, for example, cannoli are often filled with sweetened ricotta and chocolate chips, while in Italy, the filling might include candied fruit or a hint of citrus. Despite these variations, the essence of cannoli remains the same: a delightful combination of crispy shells and creamy filling.
The evolution of cannoli has also seen the introduction of modern techniques and ingredients. While traditional recipes call for frying the shells, some bakers now bake them for a lighter alternative. Similarly, the filling can be adapted to include flavors like pistachio, chocolate, or even savory ingredients for a unique twist.
Ingredient Deep Dive
Ricotta Cheese
Ricotta cheese is the star of the cannoli filling, providing a creamy and slightly tangy base. Originating from Italy, ricotta is made from the whey left over from cheese production, giving it a light and fluffy texture. It is rich in protein and calcium, making it a nutritious addition to the dessert. When selecting ricotta, opt for a high-quality, whole-milk variety for the best flavor and texture. Store it in the refrigerator and use it within a few days of opening. If ricotta is unavailable, mascarpone or cream cheese can be used as substitutes, though the flavor will differ slightly.
Cannoli Shells
The crispy shells are made from a simple dough of flour, sugar, butter, and wine. The wine not only adds flavor but also helps create a tender, flaky texture. The dough is rolled thin, cut into circles, and wrapped around cannoli tubes before frying. The frying process gives the shells their signature golden color and crunch. For a healthier alternative, the shells can be baked, though this will result in a slightly different texture. Store the shells in an airtight container to maintain their crispiness, and fill them just before serving to prevent sogginess.
Common Mistakes to Avoid
- Overworking the dough: This can make the shells tough instead of crispy.
- Filling the shells too early: This can cause them to become soggy. Fill them just before serving.
- Using low-quality ricotta: This can affect the flavor and texture of the filling. Opt for a high-quality, whole-milk ricotta.
- Not chilling the dough: Chilling the dough before rolling and cutting helps prevent shrinkage during frying.
- Overfilling the cannoli: This can cause the shells to crack. Use a pastry bag for precise filling.
- Frying at the wrong temperature: Too hot, and the shells will burn; too cool, and they will be greasy. Aim for 350°F (175°C).
- Skipping the cannoli tubes: These are essential for shaping the shells. If you don’t have them, you can use aluminum foil rolled into tubes.
- Not dusting with powdered sugar: This adds a final touch of sweetness and enhances the presentation.
Essential Techniques
Rolling the Dough
Rolling the dough thin is crucial for achieving crispy cannoli shells. Use a pasta machine or rolling pin to roll the dough to about 1/8-inch thickness. If the dough is too thick, the shells will be doughy instead of crispy. Chill the dough before rolling to make it easier to handle and to prevent shrinkage during frying.
Frying the Shells
Frying the shells at the right temperature is key to achieving the perfect texture. Heat the oil to 350°F (175°C) and maintain this temperature throughout the frying process. Use a thermometer to monitor the temperature, as fluctuations can affect the outcome. Fry the shells until they are golden brown, then drain them on paper towels to remove excess oil.
Pro Tips for Perfect Cannoli
- Use a pastry bag to fill the cannoli for a neat and professional look.
- Add a splash of orange or lemon zest to the filling for a fresh, citrusy flavor.
- Dust the finished cannoli with powdered sugar just before serving for a beautiful presentation.
- If you don’t have cannoli tubes, you can make your own using aluminum foil rolled into tubes.
- For a lighter version, bake the shells instead of frying them.
- Experiment with different fillings, such as chocolate ricotta or pistachio cream.
- Serve the cannoli immediately after filling to maintain the crispiness of the shells.
Variations and Adaptations
Regional Variations
In Sicily, cannoli are often filled with ricotta and candied fruit, while in other parts of Italy, chocolate chips or pistachios are common additions. In the United States, cannoli are sometimes filled with sweetened ricotta and chocolate chips, and the shells may be dipped in chocolate for an extra indulgent touch.
Seasonal Adaptations
For a festive twist, add seasonal flavors to the filling. In the fall, try adding pumpkin puree and spices like cinnamon and nutmeg. In the spring, incorporate fresh berries or citrus zest for a bright, refreshing flavor.
Serving and Presentation Guide
Cannoli are best served immediately after filling to maintain the crispiness of the shells. Arrange them on a platter and dust with powdered sugar for a classic presentation. For a more elaborate display, garnish with chopped pistachios, chocolate shavings, or candied fruit. Serve with a cup of espresso or dessert wine for a truly authentic Italian experience.
Wine and Beverage Pairing
Cannoli pair beautifully with sweet dessert wines like Moscato or Vin Santo. For a non-alcoholic option, try serving them with a cup of strong espresso or a citrus-infused herbal tea. The sweetness of the cannoli complements the bold flavors of these beverages, creating a harmonious balance.
Storage and Shelf Life
Cannoli shells can be stored in an airtight container at room temperature for up to 2 days. The filling should be stored separately in the refrigerator and used within 3 days. Fill the shells just before serving to maintain their crispiness. Cannoli do not freeze well, as the shells tend to lose their texture when thawed.
Make Ahead Strategies
You can prepare the cannoli shells and filling up to 2 days in advance. Store the shells in an airtight container at room temperature and the filling in the refrigerator. Fill the shells just before serving to ensure they remain crispy. If you need to make the shells further in advance, you can freeze them for up to a month, though the texture may be slightly affected.
Scaling Instructions
This recipe can easily be scaled up or down depending on your needs. For larger gatherings, double or triple the ingredients, but be sure to fry the shells in batches to avoid overcrowding the pot. If you’re making a smaller batch, halve the ingredients and adjust the frying time accordingly. Keep in mind that the dough and filling can be made in advance, making it easier to scale the recipe as needed.
Nutritional Deep Dive
Cannoli are a rich dessert, with each serving providing a good amount of calories, primarily from the ricotta filling and fried shells. Ricotta cheese is a good source of protein and calcium, while the shells provide carbohydrates and fats. To make a lighter version, consider baking the shells and using low-fat ricotta. However, for a traditional treat, enjoy cannoli in moderation as part of a balanced diet.
Dietary Adaptations
Gluten-Free
To make gluten-free cannoli, use a gluten-free flour blend for the shells. Be sure to check that all other ingredients, including the ricotta and any add-ins, are gluten-free.
Dairy-Free
For a dairy-free version, substitute the ricotta with a dairy-free alternative like almond or coconut-based ricotta. Use a plant-based butter in the dough and ensure that any chocolate chips or other add-ins are dairy-free.
Troubleshooting Guide
Texture Issues
If your cannoli shells are too tough, you may have overworked the dough. Be sure to handle it gently and roll it out to the correct thickness. If the shells are greasy, the oil may not have been hot enough. Use a thermometer to ensure the oil is at the right temperature.
Flavor Balance
If the filling is too sweet, reduce the amount of sugar or add a bit of lemon zest to balance the flavors. If the shells are bland, try adding a pinch of salt to the dough or a bit of cinnamon for extra flavor.
Recipe Success Stories
Many home bakers have found success with this cannoli recipe, praising its simplicity and delicious results. One reader shared that they made the shells ahead of time for a party and filled them just before serving, resulting in perfectly crispy cannoli that were a hit with guests. Another reader experimented with adding chocolate chips and orange zest to the filling, creating a unique twist on the classic recipe.
Frequently Asked Questions
Can I bake the cannoli shells instead of frying them?
Yes, you can bake the shells for a lighter version. However, the texture will be slightly different, and they may not be as crispy as fried shells.
Can I make the filling ahead of time?
Yes, the filling can be made up to 3 days in advance and stored in the refrigerator. Be sure to give it a good stir before using.
What can I use if I don’t have cannoli tubes?
You can make your own tubes using aluminum foil rolled into cylinders. Alternatively, you can use wooden dowels or even clean, empty spice jars.
Additional Resources
For more Italian dessert recipes, check out our guides to tiramisu, panna cotta, and biscotti. If you’re new to frying, our technique guide on deep frying will help you achieve perfect results every time. For ingredient tips, explore our deep dive into ricotta cheese and other dairy products.
Join the Conversation
We love hearing from our readers! Share your cannoli creations on social media using the hashtag #HomemadeCannoli and tag us for a chance to be featured. If you have any tips or variations, leave a comment below or join our community forum to connect with other baking enthusiasts. Don’t forget to rate the recipe and let us know how it turned out!
The Recipe
Cannoli
Serves: 12 cannoli
Prep Time: 45 mins
Cook Time: 20 mins
Total Time: 65 mins
Kitchen Equipment Needed
- Cannoli tubes
- Deep fryer or heavy-bottomed pot
- Pastry bag
- Rolling pin or pasta machine
- Thermometer
Ingredients
- 2 cups all-purpose flour
- 2 tbsp granulated sugar
- 1/4 tsp salt
- 2 tbsp unsalted butter, cold and cubed
- 1/2 cup dry white wine
- 1 egg white, lightly beaten
- Vegetable oil, for frying
- 2 cups ricotta cheese
- 1/2 cup powdered sugar
- 1 tsp vanilla extract
- 1/4 cup mini chocolate chips (optional)
- Powdered sugar, for dusting
Directions
- In a large bowl, whisk together the flour, sugar, and salt. Cut in the butter until the mixture resembles coarse crumbs. Gradually add the wine, mixing until the dough comes together. Knead briefly, then wrap in plastic and chill for 30 minutes.
- Roll the dough out to 1/8-inch thickness. Cut into 4-inch circles. Wrap each circle around a cannoli tube, sealing the edges with egg white.
- Heat the oil to 350°F (175°C). Fry the shells until golden brown, about 2-3 minutes. Remove and drain on paper towels. Let cool slightly before carefully removing the tubes.
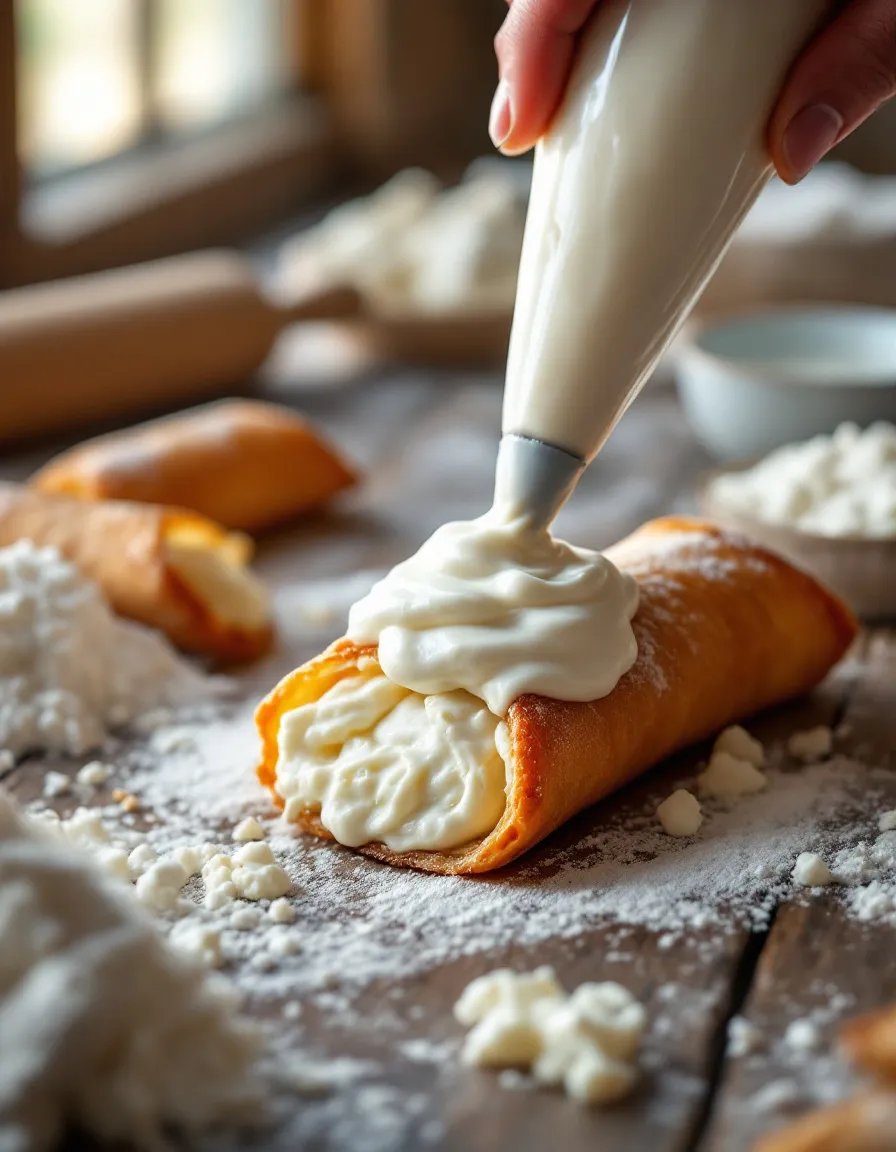
- In a medium bowl, mix the ricotta, powdered sugar, and vanilla until smooth. Stir in the chocolate chips if using. Transfer the filling to a pastry bag.
- Fill the cooled shells with the ricotta mixture, piping from both ends. Dust with powdered sugar and serve immediately.
Recipe Notes
- For a lighter version, bake the shells at 375°F (190°C) for 10-12 minutes.
- Add orange or lemon zest to the filling for a citrusy twist.
- Store unfilled shells in an airtight container for up to 2 days.