Homemade Cherry Pie: The Queen of All Summer Pie Recipes
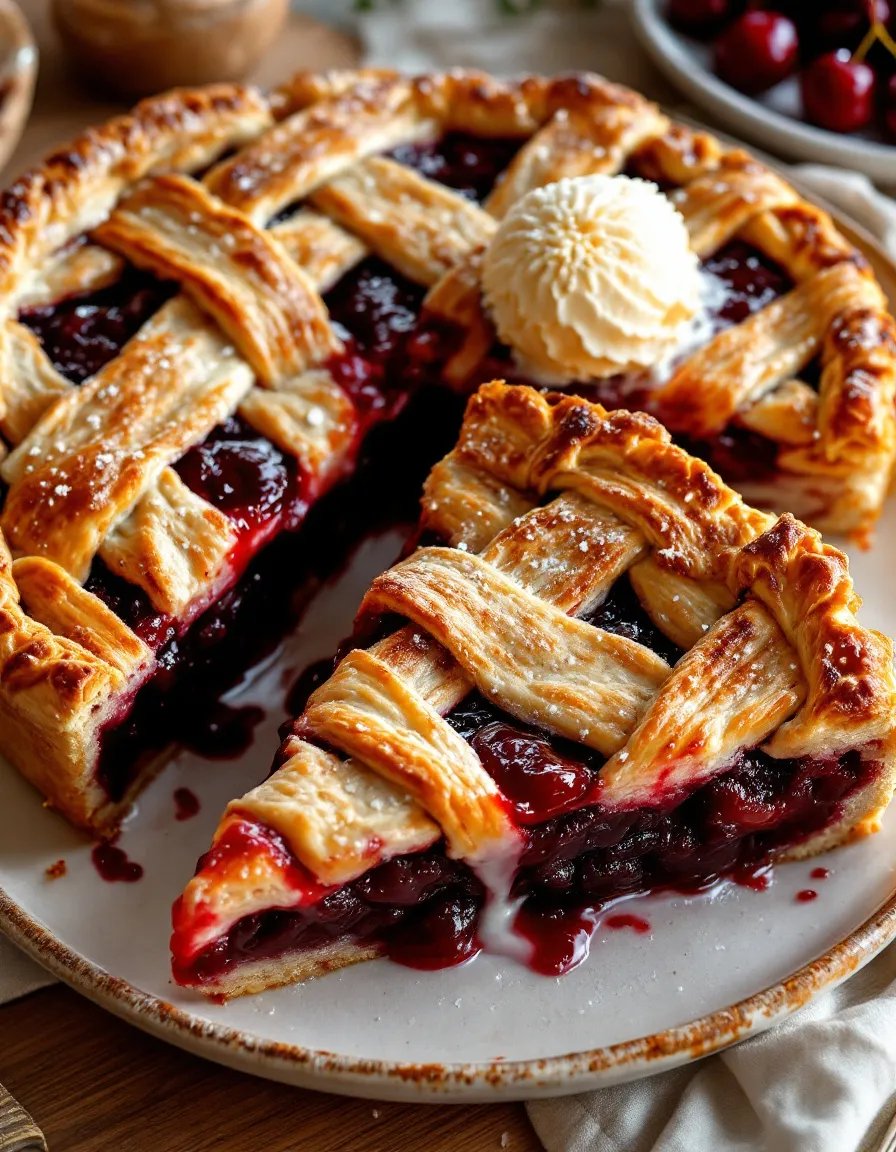
There’s nothing quite like a homemade cherry pie to capture the essence of summer. Bursting with juicy, tart cherries encased in a flaky, buttery crust, this dessert is a showstopper at any gathering. Whether you’re hosting a backyard barbecue or simply craving a slice of nostalgia, this cherry pie recipe is guaranteed to impress. The secret lies in the homemade pie dough, which creates the perfect balance of crispness and tenderness. Every bite is a celebration of seasonal flavors, making it the ultimate summer treat.
The beauty of this recipe is its simplicity. With just a handful of ingredients, you can create a dessert that looks and tastes like it came straight from a bakery. The vibrant red filling, speckled with golden crust, is as visually stunning as it is delicious. Plus, the aroma of fresh cherries and warm pastry wafting through your kitchen is irresistible. Whether you’re a seasoned baker or a beginner, this recipe is approachable and rewarding. Let’s dive into the details of making the best homemade cherry pie you’ve ever tasted.
Quick Recipe Highlights
- Flavor Profile: A perfect balance of sweet and tart, with a hint of almond extract to enhance the cherry flavor.
- Texture: Juicy cherry filling paired with a flaky, buttery crust that melts in your mouth.
- Aroma: The scent of fresh cherries and warm pastry fills your kitchen, creating an inviting atmosphere.
- Visual Appeal: Vibrant red filling with a golden, lattice-topped crust that’s as beautiful as it is delicious.
- Skill Level Needed: Intermediate, but beginner-friendly with clear instructions.
- Special Equipment: Rolling pin, pie dish, and a pastry brush for the perfect finish.
Recipe Overview
- Difficulty Level: This recipe is intermediate due to the homemade pie crust, but detailed instructions make it accessible for all skill levels.
- Category: Dessert, perfect for summer gatherings or cozy family dinners.
- Cuisine: A classic American dessert with roots in traditional baking.
- Cost: Affordable, especially when cherries are in season, with most ingredients being pantry staples.
- Season: Best enjoyed in summer when cherries are at their peak freshness.
- Occasion: Ideal for picnics, potlucks, or as a sweet ending to a summer meal.
Why You’ll Love This Recipe
This homemade cherry pie is a celebration of summer in every bite. The combination of tart cherries and sweet filling creates a flavor profile that’s both refreshing and indulgent. The flaky, buttery crust adds the perfect contrast to the juicy filling, making each slice a textural delight. Whether you’re serving it warm with a scoop of vanilla ice cream or enjoying it cold the next day, this pie is sure to become a favorite.
One of the best things about this recipe is its versatility. You can use fresh or frozen cherries, making it a year-round option. The homemade pie dough is simple to prepare and yields a crust that’s far superior to store-bought versions. Plus, the lattice top adds a touch of elegance, making it a showstopper at any gathering. The aroma of baking cherries and buttery pastry is irresistible, filling your home with warmth and nostalgia.
From a nutritional standpoint, cherries are packed with antioxidants and vitamins, making this dessert a slightly healthier option compared to other pies. The recipe also allows for customization, so you can adjust the sweetness to your liking. Whether you’re baking for a crowd or just for yourself, this cherry pie is a labor of love that’s worth every minute.
Historical Background and Cultural Significance
Cherry pie has a rich history in American cuisine, often associated with summer celebrations and family gatherings. The tradition of baking fruit pies dates back to early settlers, who used seasonal fruits to create hearty, comforting desserts. Cherries, with their vibrant color and bold flavor, quickly became a favorite filling.
The iconic lattice-top design is believed to have originated in Europe, where bakers used intricate patterns to showcase their skills. Over time, this technique made its way to America, becoming a staple of classic cherry pie. Today, cherry pie is synonymous with summer, often enjoyed at picnics, barbecues, and Fourth of July celebrations.
Regional variations of cherry pie exist across the country, with some recipes incorporating sour cherries for a tangier flavor, while others use sweet cherries for a more dessert-like taste. Regardless of the variation, the essence of cherry pie remains the same: a celebration of seasonal fruit and homemade baking.
Ingredient Deep Dive
Cherries
Cherries are the star of this recipe, providing a burst of flavor and vibrant color. Fresh cherries are ideal, but frozen cherries work just as well when fresh ones are out of season. Cherries are rich in antioxidants, particularly anthocyanins, which have anti-inflammatory properties. When selecting cherries, look for firm, plump fruit with a deep red color. Store them in the refrigerator and wash just before use.
Homemade Pie Dough
The homemade pie dough is what sets this recipe apart. Made with just flour, butter, salt, and water, it’s simple yet incredibly flavorful. The key to a flaky crust is keeping the butter cold and handling the dough as little as possible. This dough can be made ahead and stored in the refrigerator or freezer for convenience.
Sugar
Sugar balances the tartness of the cherries and adds sweetness to the filling. You can adjust the amount based on your preference or the sweetness of your cherries. For a deeper flavor, consider using brown sugar or a mix of white and brown sugar.
Cornstarch
Cornstarch acts as a thickening agent, ensuring the filling sets properly without becoming too runny. It’s a crucial ingredient for achieving the perfect pie consistency.
Common Mistakes to Avoid
- Overworking the dough: This can lead to a tough crust. Handle the dough as little as possible.
- Using warm butter: Cold butter is essential for a flaky crust. Keep it chilled until ready to use.
- Overfilling the pie: Too much filling can cause the pie to bubble over and make a mess in your oven.
- Not venting the crust: Properly venting the top crust allows steam to escape, preventing a soggy bottom.
- Skipping the egg wash: An egg wash gives the crust a beautiful golden color and adds a slight shine.
Essential Techniques
Making the Pie Dough
The key to perfect pie dough is keeping the ingredients cold and handling the dough minimally. Use a pastry cutter or your fingers to incorporate the butter into the flour until it resembles coarse crumbs. Add ice water gradually, mixing just until the dough comes together.
Rolling the Dough
Roll the dough on a lightly floured surface, turning it occasionally to prevent sticking. Aim for an even thickness to ensure even baking.
Creating a Lattice Top
Cut the rolled-out dough into strips and weave them over the filling. This technique adds visual appeal and allows steam to escape during baking.
Pro Tips for Perfect Homemade Cherry Pie
- Chill the dough before rolling it out to make it easier to handle.
- Use a mix of sweet and tart cherries for a balanced flavor.
- Brush the crust with an egg wash for a golden, shiny finish.
- Let the pie cool completely before slicing to allow the filling to set.
Variations and Adaptations
Regional Variations
In some regions, sour cherries are preferred for their tangy flavor, while others opt for sweet cherries. You can also experiment with different spices, such as cinnamon or nutmeg, to add depth to the filling.
Dietary Modifications
For a gluten-free version, use a gluten-free flour blend for the crust. To make it vegan, substitute the butter with plant-based butter and use a flax egg for the egg wash.
Serving and Presentation Guide
Serve the pie warm with a scoop of vanilla ice cream or a dollop of whipped cream. For a festive touch, garnish with fresh cherries or a dusting of powdered sugar. Slice the pie with a sharp knife for clean, even pieces.
Wine and Beverage Pairing
Pair this cherry pie with a glass of sweet dessert wine, such as Moscato or Riesling. For a non-alcoholic option, try a cherry-infused iced tea or sparkling water with a splash of cherry juice.
Storage and Shelf Life
Store the pie at room temperature for up to two days or in the refrigerator for up to five days. To freeze, wrap the pie tightly in plastic wrap and aluminum foil. Reheat in the oven at 350°F for 10-15 minutes.
Make Ahead Strategies
Prepare the pie dough and filling up to two days in advance. Assemble and bake the pie the day you plan to serve it for the freshest results.
Scaling Instructions
To double the recipe, simply double all ingredients and use two pie dishes. Adjust baking times as needed, keeping an eye on the crust to prevent over-browning.
Nutritional Deep Dive
Cherries are a good source of vitamin C and fiber, while the crust provides carbohydrates and fats. For a lighter version, reduce the sugar and use a whole-grain flour blend.
Dietary Adaptations
Gluten-Free
Use a gluten-free flour blend for the crust and ensure all other ingredients are gluten-free.
Vegan
Substitute butter with plant-based butter and use a flax egg for the egg wash.
Troubleshooting Guide
Soggy Crust
Ensure the filling is not too wet and vent the crust properly to allow steam to escape.
Runny Filling
Let the pie cool completely before slicing to allow the filling to set.
Recipe Success Stories
Many home bakers have shared their success with this recipe, praising its simplicity and delicious results. One reader even used it to win a local baking contest!
Frequently Asked Questions
Can I use frozen cherries?
Yes, frozen cherries work well. Just thaw and drain them before using.
How do I prevent the crust from burning?
Cover the edges with foil or a pie crust shield during baking.
Additional Resources
For more pie recipes and baking tips, check out our guides on perfecting pie crusts and seasonal fruit desserts.
Join the Conversation
Share your cherry pie creations on social media using #HomemadeCherryPie. We’d love to see your photos and hear your tips!
The Recipe
Homemade Cherry Pie
Serves: 8
Prep Time: 30 mins
Cook Time: 50 mins
Total Time: 80 mins
Kitchen Equipment Needed
- Rolling pin
- 9-inch pie dish
- Pastry brush
- Mixing bowls
Ingredients
- 4 cups fresh or frozen cherries, pitted
- 1 cup granulated sugar
- 3 tbsp cornstarch
- 1/4 tsp almond extract
- 2 1/2 cups all-purpose flour
- 1 cup unsalted butter, cold
- 1/2 tsp salt
- 6-8 tbsp ice water
- 1 egg, beaten (for egg wash)
Directions
- In a large bowl, combine cherries, sugar, cornstarch, and almond extract. Set aside.
- In another bowl, mix flour and salt. Cut in cold butter until the mixture resembles coarse crumbs.
- Gradually add ice water, mixing until the dough comes together. Divide into two discs, wrap in plastic, and chill for 30 minutes.
- Roll out one disc of dough and place it in a pie dish. Add the cherry filling.
- Roll out the second disc and cut into strips. Create a lattice top over the filling.
- Brush the crust with beaten egg and bake at 375°F for 50 minutes, or until golden brown.
Recipe Notes
- For a sweeter pie, increase the sugar to 1 1/4 cups.
- If using frozen cherries, thaw and drain them before using.