Homemade Coffee Ice Cream: A Rich and Creamy Caffeinated Treat
There’s nothing quite like the rich, velvety smoothness of homemade coffee ice cream. This decadent dessert combines the bold, aromatic flavors of freshly brewed coffee with the luxurious creaminess of a perfectly churned custard base. Whether you’re a coffee aficionado or just looking for a sophisticated frozen treat, this recipe delivers an unforgettable experience that will have you skipping the store-bought versions forever.
The magic of this homemade coffee ice cream lies in its simplicity and quality ingredients. By using real coffee beans or strong espresso, you create a depth of flavor that powdered mixes can’t match. The custard base, made with egg yolks and heavy cream, provides a silky texture that melts beautifully on your tongue. Every spoonful offers a perfect balance of bitter coffee notes and sweet creaminess, making it an ideal dessert for any occasion.
Quick Recipe Highlights
- Flavor Profile: Bold coffee notes balanced with sweet creaminess and a hint of vanilla
- Texture: Ultra-creamy and smooth with just the right amount of firmness
- Aroma: Rich coffee fragrance with subtle vanilla undertones
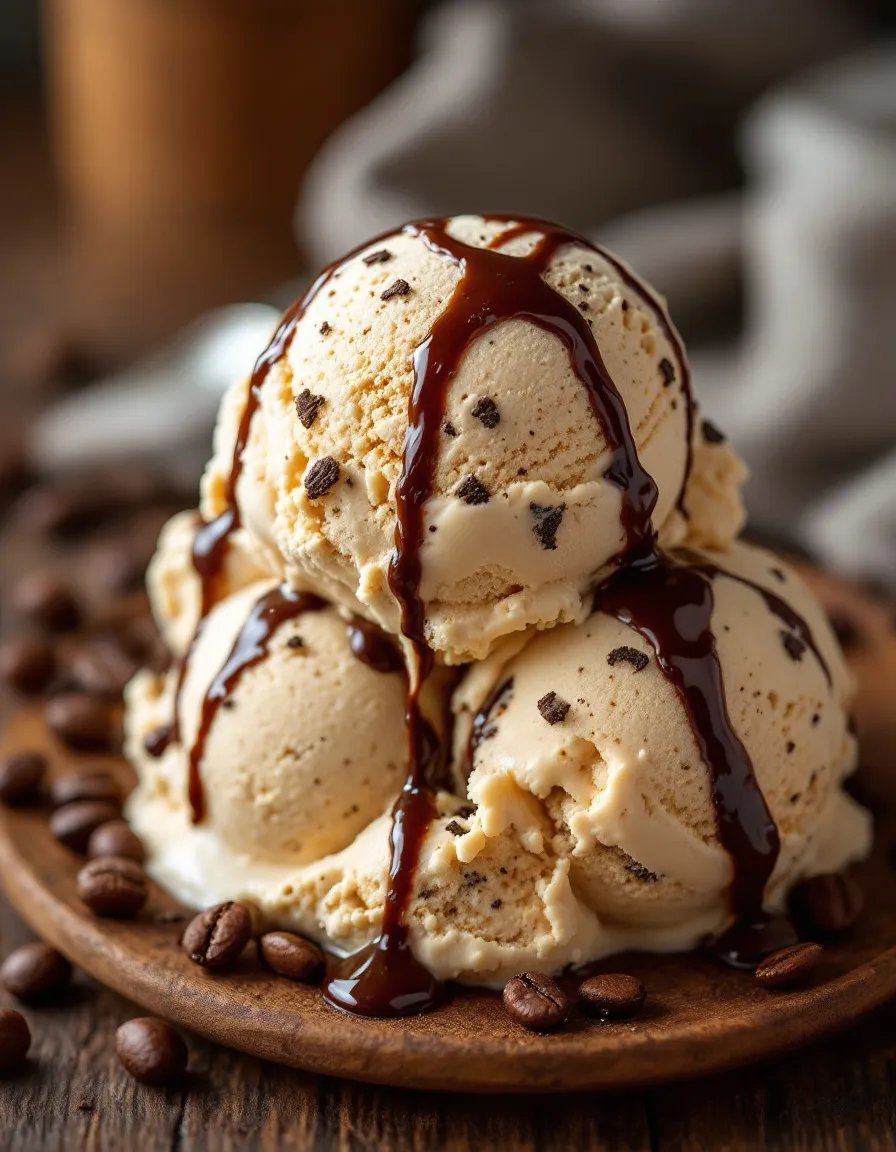
- Visual Appeal: Beautiful light brown color with a glossy finish
- Skill Level Needed: Basic cooking skills required for custard preparation
- Special Equipment: Ice cream maker needed for best results
Recipe Overview
- Difficulty Level: This recipe requires some cooking skills to prepare the custard base properly without scrambling the eggs, but the steps are straightforward with careful attention.
- Category: Dessert, Frozen Treat
- Cuisine: International with Italian gelato influences
- Cost: Moderate – uses quality dairy and coffee ingredients
- Season: Perfect year-round, especially refreshing in summer
- Occasion: Dinner parties, afternoon treats, or special celebrations
Why You’ll Love This Homemade Coffee Ice Cream
The first thing you’ll notice about this homemade coffee ice cream is its incredible depth of flavor. Unlike commercial versions that often taste artificial, this recipe uses real coffee to create an authentic, robust coffee taste. The custard base adds a luxurious richness that makes each spoonful feel like a special treat. The texture is perfectly creamy without being too hard or icy – just like premium artisan ice cream.
Making your own coffee ice cream at home gives you complete control over the ingredients. You can choose organic dairy, fair-trade coffee, and adjust the sweetness to your preference. It’s also surprisingly satisfying to create this gourmet dessert from scratch. The process of steeping the coffee, making the custard, and watching it transform in the ice cream maker is almost as rewarding as eating the final product.
Nutritionally, homemade ice cream can be a better choice than store-bought versions because you avoid artificial stabilizers and excessive preservatives. While still a treat, you can feel good about using real, wholesome ingredients. The coffee in this recipe also provides a small caffeine boost, making it perfect for an afternoon pick-me-up.
This coffee ice cream recipe is incredibly versatile for entertaining. Serve it in elegant bowls for dinner parties, make ice cream sandwiches with chocolate cookies, or create an impressive affogato by pouring hot espresso over a scoop. It’s always a crowd-pleaser and shows off your culinary skills. Guests will be impressed that you made ice cream from scratch!
Despite its gourmet quality, this recipe is surprisingly cost-effective compared to premium store-bought ice creams. A single batch makes about 1.5 quarts, which would cost significantly more if purchased from specialty ice cream shops. Plus, you can customize it endlessly with different coffee varieties or mix-ins.
Ingredient Deep Dive
Heavy Cream
Heavy cream forms the luxurious base of our homemade coffee ice cream, providing the rich mouthfeel that makes this dessert so special. With at least 36% milk fat, heavy cream whips beautifully and prevents ice crystals from forming during freezing. Look for pasteurized (not ultra-pasteurized) cream for the best flavor. Store in the coldest part of your refrigerator and use within a week of opening.
Whole Milk
Whole milk balances the richness of the cream while adding necessary proteins for structure. The 3.5-4% milk fat content helps create a smooth texture without making the ice cream too heavy. For best results, use fresh, high-quality milk. If you’re lactose intolerant, you can substitute with lactose-free whole milk with minimal flavor difference.
Egg Yolks
Egg yolks are the magic ingredient that transforms our mixture into a proper custard base. The lecithin in yolks acts as an emulsifier while the proteins help stabilize the ice cream. Fresh, organic yolks will give the richest color and flavor. If concerned about raw eggs, you can use pasteurized eggs or heat the mixture to 160°F (71°C) to eliminate any risk.
Freshly Brewed Coffee
The star of our homemade coffee ice cream, freshly brewed coffee provides the authentic flavor that makes this recipe special. Use a strong brew from quality beans – either espresso or a dark roast works well. The coffee should be cooled completely before adding to the custard. For an extra flavor boost, you can steep whole coffee beans in the warm milk mixture before making the custard.
Common Mistakes to Avoid
- Overheating the custard: Cook the custard slowly over medium-low heat to avoid scrambling the eggs. The mixture should thicken enough to coat the back of a spoon.
- Using weak coffee: The coffee flavor mellows during freezing, so use a strong brew or espresso for maximum flavor impact.
- Skipping the chill time: The base must be thoroughly chilled (at least 4 hours) before churning for proper texture.
- Overfilling the ice cream maker: Leave room for expansion as the mixture freezes and incorporates air.
- Inadequate freezing after churning: The ice cream needs several hours in the freezer to firm up properly after churning.
- Using old dairy products: Fresh cream and milk make a noticeable difference in flavor and texture.
- Not straining the custard: Always strain the cooked custard through a fine mesh sieve to remove any cooked egg bits.
- Adding mix-ins too early: Stir in any chocolate chips or other additions during the last few minutes of churning.
Essential Techniques
Tempering Eggs
Tempering is crucial for creating a smooth custard without scrambled eggs. Slowly whisk about 1/3 of the hot milk mixture into the beaten yolks to gradually raise their temperature. Then pour the tempered yolks back into the remaining hot milk while constantly whisking. This gentle approach prevents the proteins from curdling too quickly.
Custard Consistency
The custard is ready when it thickens enough to coat the back of a spoon (about 170°F/77°C). Draw a line with your finger – if it holds cleanly without running, the custard has reached the proper consistency. Overcooking will make the texture grainy, while undercooking won’t provide enough stability.
Proper Chilling
Chilling the base thoroughly before churning (at least 4 hours, preferably overnight) allows the flavors to meld and ensures proper freezing in the ice cream maker. Cover the surface with plastic wrap to prevent a skin from forming as it cools.
Pro Tips for Perfect Homemade Coffee Ice Cream
- For extra coffee flavor, steep whole coffee beans in the warm milk mixture for 30 minutes before making the custard.
- Add a tablespoon of coffee liqueur or vodka to the mix before churning – the alcohol prevents ice crystals from forming.
- Use an instant-read thermometer to monitor the custard temperature precisely (170°F/77°C is ideal).
- Pre-chill your ice cream maker bowl for at least 24 hours for best results.
- For a smoother texture, let the ice cream sit at room temperature for 5 minutes before scooping.
- Store the ice cream in an airtight container with parchment paper pressed directly on the surface to prevent freezer burn.
Variations and Adaptations
Mocha Chip
Add 1/2 cup of chopped dark chocolate or chocolate chips during the last few minutes of churning for a delicious mocha variation. The bitterness of dark chocolate complements the coffee flavor beautifully.
Affogato-Style
Serve scoops of your homemade coffee ice cream in small cups and pour a shot of hot espresso over the top for an authentic Italian affogato dessert.
Dairy-Free Version
Replace the dairy with full-fat coconut milk and use 6 egg yolks for extra richness. The coconut flavor pairs surprisingly well with coffee.
Serving and Presentation Guide
For elegant presentation, scoop your homemade coffee ice cream using a warmed ice cream scoop and place it in chilled bowls or glasses. Garnish with chocolate-covered coffee beans, a dusting of cocoa powder, or a drizzle of caramel sauce. Serve with crisp almond biscotti for dipping or alongside a slice of flourless chocolate cake for a decadent dessert pairing.
Storage and Shelf Life
Store your homemade coffee ice cream in an airtight container with parchment paper pressed directly on the surface to prevent ice crystals. It will keep its best texture for about 2 weeks in the freezer, though the flavor remains good for up to a month. For easier scooping, let it sit at room temperature for 5-10 minutes before serving.
Frequently Asked Questions
Can I make this without an ice cream maker?
Yes, though the texture won’t be as creamy. Pour the chilled mixture into a shallow dish and freeze, stirring vigorously every 30 minutes for the first 2-3 hours to break up ice crystals. This manual method requires more effort but can produce decent results.
How can I make my coffee ice cream stronger?
For more intense coffee flavor, steep whole coffee beans in the warm milk mixture for 30-60 minutes before making the custard. You can also add 1-2 teaspoons of instant espresso powder to the cooled custard before churning.
Why is my ice cream too hard?
Hard ice cream usually results from insufficient fat content or sugar, or from freezing too quickly. Try adding 1-2 tablespoons of alcohol (like coffee liqueur or vodka) to your next batch to keep it scoopable.
The Recipe
Homemade Coffee Ice Cream
Serves: 6
Prep Time: 15 mins
Cook Time: 20 mins
Total Time: 35 mins (plus chilling and freezing time)
Kitchen Equipment Needed
- Medium saucepan
- Mixing bowls
- Whisk
- Fine mesh strainer
- Ice cream maker
- Airtight freezer container
Ingredients
- 2 cups heavy cream
- 1 cup whole milk
- 3/4 cup granulated sugar
- 6 large egg yolks
- 1/2 cup strongly brewed coffee or espresso, cooled
- 1 teaspoon vanilla extract
- Pinch of salt
Directions
- In a medium saucepan, combine the cream, milk, and half the sugar. Heat over medium until steaming but not boiling, stirring occasionally.
- In a separate bowl, whisk the egg yolks with remaining sugar until pale and slightly thickened.
- Slowly pour about 1 cup of the hot milk mixture into the yolks while whisking constantly (tempering).
- Pour the tempered yolk mixture back into the saucepan and cook over medium-low heat, stirring constantly, until thickened enough to coat the back of a spoon (170°F/77°C).
- Strain the custard through a fine mesh sieve into a clean bowl. Stir in the cooled coffee, vanilla, and salt.
- Cover and refrigerate until completely chilled (at least 4 hours, preferably overnight).
- Churn in an ice cream maker according to manufacturer’s instructions (about 20-25 minutes).
- Transfer to an airtight container and freeze until firm (about 4 hours) before serving.
Recipe Notes
- For extra coffee flavor, steep 1/2 cup whole coffee beans in the warm milk mixture for 30 minutes before making the custard (strain out before tempering eggs).
- Add 1-2 tablespoons of coffee liqueur or vodka before churning for a softer texture.
- For mocha chip variation, stir in 1/2 cup chopped dark chocolate during the last few minutes of churning.

