Homemade Vanilla Ice Cream: The Creamiest Classic Dessert
Nothing beats the creamy perfection of homemade vanilla ice cream. This classic frozen dessert features a rich custard base infused with real vanilla beans, creating a luxurious texture and pure vanilla flavor that store-bought versions simply can’t match. The velvety smoothness melts perfectly on your tongue, releasing waves of sweet, floral vanilla notes that make this treat irresistible.
Making vanilla ice cream from scratch might seem intimidating, but our foolproof recipe breaks it down into simple steps. You’ll be amazed at how a few quality ingredients transform into something extraordinary. The aroma of vanilla beans simmering in cream will fill your kitchen with warmth, promising the delightful frozen dessert to come. Whether enjoyed alone or as part of an elaborate sundae, this homemade vanilla ice cream will become your new favorite.
Quick Recipe Highlights
- Flavor Profile: Rich vanilla bean flavor with sweet creaminess and subtle floral notes from real vanilla.
- Texture: Ultra-creamy and smooth with perfect scoopability thanks to the custard base.
- Aroma: Heavenly vanilla fragrance with warm, sweet dairy notes that entice the senses.
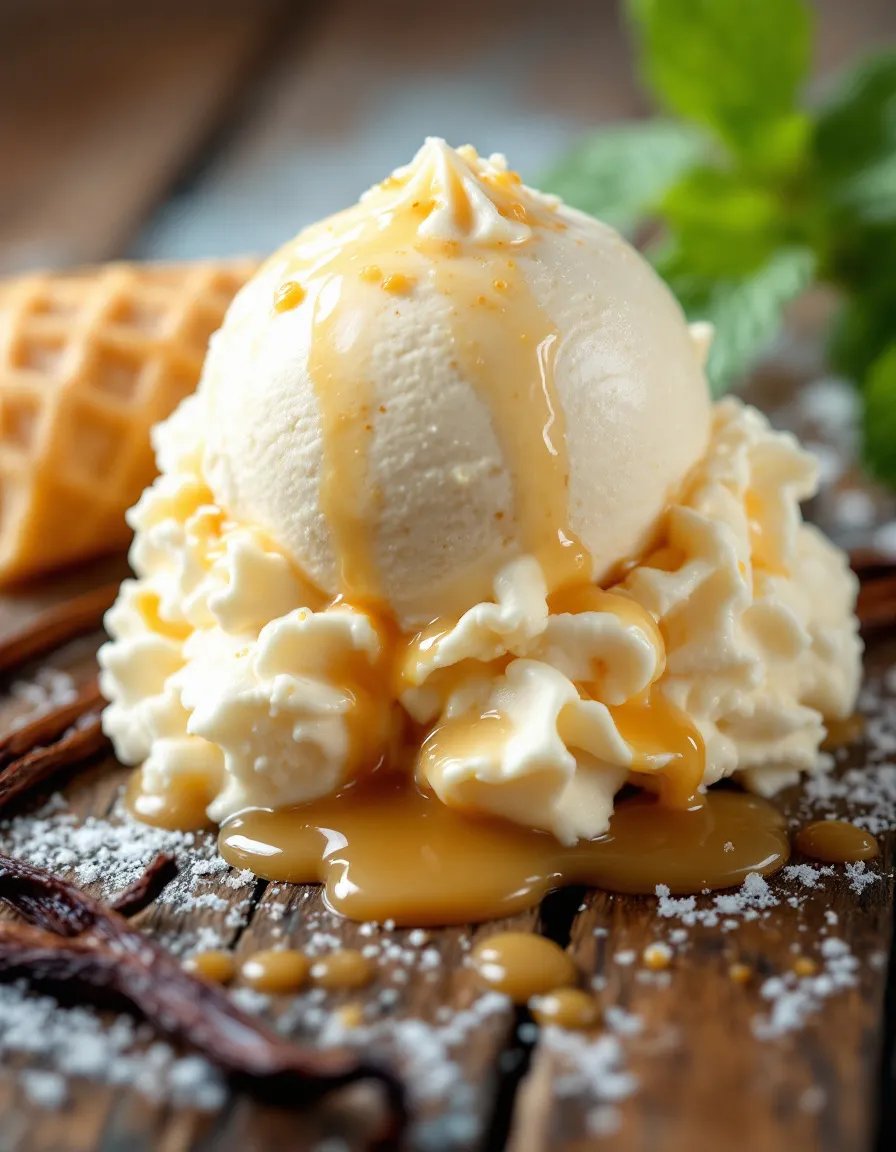
- Visual Appeal: Beautiful pale yellow color with visible vanilla bean specks throughout.
- Skill Level Needed: Beginner-friendly with simple techniques anyone can master.
- Special Equipment: Requires an ice cream maker for best results.
Recipe Overview
- Difficulty Level: This homemade vanilla ice cream recipe is perfect for beginners, with straightforward steps and common ingredients. The only challenging aspect is tempering the eggs, which we explain in detail.
- Category: Dessert, frozen treat, sweet course.
- Cuisine: Classic American dessert with French custard techniques.
- Cost: Moderate – uses premium ingredients like vanilla beans but makes a generous quantity.
- Season: Perfect year-round, but especially refreshing in summer months.
- Occasion: Ideal for dinner parties, barbecues, or simple family treats.
Why You’ll Love This Homemade Vanilla Ice Cream
The taste of this homemade vanilla ice cream is incomparable to store-bought versions. Using real vanilla beans creates a complex flavor profile with floral, sweet, and slightly woody notes that artificial extracts can’t replicate. The custard base gives it an ultra-creamy texture that melts perfectly on your tongue, making each spoonful a luxurious experience.
Preparing ice cream at home allows you to control every ingredient, ensuring quality and freshness. You can adjust the sweetness to your preference and avoid the stabilizers and preservatives found in commercial products. The process is surprisingly simple and rewarding – watching liquid transform into creamy frozen perfection is magical.
Nutritionally, homemade vanilla ice cream offers benefits over commercial versions. You can use organic dairy and eggs, and reduce sugar if desired. The protein from eggs and milk makes it more satisfying than air-filled store brands. Plus, vanilla contains antioxidants and has been shown to have calming properties.
This recipe is perfect for entertaining. Imagine serving guests homemade vanilla ice cream with fresh berries or warm pie. The wow factor is undeniable, and you can customize it with different toppings or mix-ins. It’s also a fun activity to make with kids, teaching them cooking basics while creating delicious memories.
Cost-wise, while vanilla beans are pricey, this recipe stretches them further than you’d think. Compared to premium artisanal ice creams, making your own saves money while delivering superior quality. The ingredients are accessible at any grocery store, making this a practical indulgence.
Historical Background and Cultural Significance
Vanilla ice cream has a rich history dating back to the 18th century. Thomas Jefferson is credited with introducing vanilla-flavored ice cream to America after encountering it in France. His original recipe from the 1780s still exists in the Library of Congress, showing how little the basic formula has changed over centuries.
Culturally, vanilla ice cream became the standard against which all other flavors were measured. Its simplicity and purity made it a canvas for culinary creativity, leading to sundaes, floats, and other classic desserts. In many cultures, serving vanilla ice cream represents hospitality and celebration.
The evolution of vanilla ice cream mirrors technological advances. Early versions required hand-cranking in ice and salt, while modern ice cream makers automate the process. Despite these changes, the appeal of creamy, vanilla-infused frozen custard remains timeless.
Regional variations have developed worldwide. French vanilla typically contains egg yolks for richness, while Philadelphia-style skips the eggs for a lighter texture. Mexican vanilla ice cream often includes cinnamon, and some Asian versions incorporate coconut milk. Our recipe follows the classic French custard method for maximum creaminess.
Ingredient Deep Dive
Vanilla Beans
Vanilla beans are the star of this homemade vanilla ice cream, providing unparalleled flavor. These fragrant pods come from orchids and undergo an extensive curing process. When split and scraped, they release thousands of tiny seeds containing vanillin, the compound responsible for vanilla’s distinctive taste and aroma.
Select plump, moist vanilla beans with a glossy sheen. Store them in an airtight container in a cool, dark place. If unavailable, pure vanilla extract can substitute, though the flavor will be less complex. For every bean, use 1 tablespoon of high-quality extract added after cooking.
Heavy Cream
Heavy cream (with 36-40% butterfat) creates the luxurious mouthfeel in homemade ice cream. The high fat content prevents ice crystal formation, ensuring smooth texture. Cream also carries vanilla flavor beautifully, making it essential for premium results.
For best quality, choose pasteurized (not ultra-pasteurized) cream without additives. Store it refrigerated and use by the expiration date. In a pinch, you can substitute half-and-half, but the texture will be less rich.
Egg Yolks
Egg yolks transform the mixture into a custard base, adding richness and stability. The lecithin in yolks acts as an emulsifier, creating a smooth texture. They also contribute to the pale yellow color of premium vanilla ice cream.
Use fresh, large eggs at room temperature for easiest incorporation. Store extra whites for another use. For egg-free versions, cornstarch can thicken the base, though the texture differs.
Common Mistakes to Avoid
- Overheating the custard: Cooking above 170°F can cause curdling. Use a thermometer and stir constantly for perfect consistency.
- Insufficient chilling: The base must be completely cold before churning, ideally overnight. Warm mixture won’t freeze properly.
- Skimping on vanilla: Premium vanilla beans or extract make all the difference. Artificial vanilla lacks depth.
- Rushing the churn: Follow your ice cream maker’s timing for ideal texture. Under-churned ice cream will be too soft.
- Improper storage: Use an airtight container with parchment pressed on the surface to prevent ice crystals.
- Substituting low-fat dairy: The high fat content in cream and whole milk is essential for creamy texture.
- Not tempering eggs properly: Adding hot liquid too quickly scrambles the eggs. Go slow for smooth custard.
- Skipping the salt: A pinch enhances all the flavors, balancing the sweetness.
Essential Techniques
Tempering Eggs
Tempering prevents scrambled eggs in your custard by gradually raising their temperature. Slowly whisk about 1 cup of the hot cream mixture into the beaten yolks, then combine everything back in the pan. This gentle approach creates smooth, lump-free ice cream base.
Testing Custard Doneness
The custard is ready when it coats the back of a spoon and a finger drawn through leaves a clean path. A thermometer should read 170-175°F. Overcooking makes the texture grainy, while undercooking risks food safety.
Proper Chilling
Chill the base thoroughly before churning – at least 4 hours, preferably overnight. This ensures proper freezing and allows flavors to meld. Cover the surface with plastic wrap to prevent skin formation.
Pro Tips for Perfect Homemade Vanilla Ice Cream
- Use vanilla bean paste if fresh beans are unavailable – it contains real seeds for speckled appearance.
- Age the base 24 hours for deeper flavor – the vanilla continues infusing as it chills.
- Pre-chill your ice cream maker bowl for at least 24 hours for most efficient freezing.
- Add a tablespoon of vodka or liqueur to prevent over-hardening in the freezer.
- For extra creaminess, replace 1/4 cup milk with cream cheese or mascarpone.
- Toast the vanilla beans briefly in a dry pan to intensify their flavor before using.
Variations and Adaptations
Regional Variations
French vanilla ice cream uses more egg yolks for richer texture, while Philadelphia-style omits eggs entirely. Mexican versions might include cinnamon or piloncillo sugar. Try infusing your base with lavender or citrus zest for unique twists.
Dietary Modifications
For dairy-free, use coconut cream and almond milk. Vegan versions can substitute cashew cream and agar for thickening. Sugar alternatives like monk fruit work well for low-carb diets.
Flavor Variations
Swirl in caramel or fudge after churning, or fold in cookie pieces. Add espresso powder for coffee vanilla, or citrus zest for brightness. The possibilities are endless with this versatile base.
Serving and Presentation Guide
Serve homemade vanilla ice cream slightly softened for perfect scoopability. Use a warmed ice cream scoop for clean portions. Classic glass bowls or cones showcase its beauty, or get creative with edible cookie bowls.
Garnish with fresh mint, berries, or a dusting of cinnamon. For special occasions, drizzle with warm sauces or top with toasted nuts. Serve alongside warm desserts like pie or brownies for irresistible contrast.
Wine and Beverage Pairing
Vanilla ice cream pairs beautifully with dessert wines like Sauternes or late-harvest Riesling. The wine’s sweetness complements the vanilla while acidity cuts the richness. For cocktails, try it with bourbon or amaretto.
Non-alcoholic options include cold brew coffee or chai tea. The ice cream mellows bitter notes while adding creamy texture. Sparkling water with lime cleanses the palate between bites.
Storage and Shelf Life
Store homemade vanilla ice cream in an airtight container with parchment pressed directly on the surface. This prevents ice crystals from forming. It keeps optimally for 1-2 weeks in the freezer’s main compartment (not the door).
Signs of spoilage include off odors, discoloration, or large ice crystals. If properly stored, it should maintain quality for up to a month, though best enjoyed within two weeks for peak texture.
Make Ahead Strategies
The custard base can be made 2-3 days in advance and stored refrigerated. Flavors actually improve with time. Simply churn when ready to serve. For parties, churn the ice cream the day before and store in the freezer.
If making multiple batches, prepare all the bases at once and chill them separately. This saves time and ensures consistent results when you’re ready to churn each flavor.
Scaling Instructions
This recipe easily doubles or triples for larger gatherings. Use a bigger pot for cooking the custard and allow extra chilling time. When halving, reduce cooking time slightly as the smaller volume heats faster.
For large batches, churn in multiple sessions rather than overfilling your ice cream maker. Keep completed batches frozen while working on the next. The recipe scales linearly with no special adjustments needed.
Nutritional Deep Dive
One serving of this homemade vanilla ice cream provides calcium from dairy and protein from eggs and milk. Vanilla contains small amounts of B vitamins and minerals. While indulgent, it offers more nutritional value than commercial versions with additives.
For lighter options, reduce sugar by 1/4 cup or substitute alternatives like honey or maple syrup. Using 2% milk instead of whole slightly lowers fat while maintaining decent texture.
Dietary Adaptations
Dairy-Free Version
Replace dairy with full-fat coconut milk and coconut cream. The natural sweetness and fat content mimic traditional texture. Add 1 teaspoon xanthan gum to prevent iciness.
Vegan Adaptation
Use cashew cream base with coconut oil for richness. Agar agar or arrowroot replaces eggs for thickening. Vanilla flavor remains excellent in these plant-based versions.
Keto-Friendly
Substitute erythritol or monk fruit for sugar and use extra cream. A pinch of glucomannan helps with texture. The carb count drops significantly while maintaining creaminess.
Troubleshooting Guide
Grainy Texture
This usually means the eggs curdled during cooking. Strain the custard through a fine sieve before chilling to remove lumps. Next time, temper more slowly and watch the temperature.
Too Hard
Ice cream that’s rock hard lacks proper fat or sugar balance. Try adding 1-2 tablespoons alcohol or corn syrup next batch. Let it soften 10 minutes before scooping.
Too Soft
Insufficient chilling time or warm freezer causes this. Ensure your base is completely cold before churning, and your freezer is at 0°F. Adding stabilizers like guar gum can help.
Frequently Asked Questions
Can I make this without an ice cream maker?
Yes, though texture differs. Pour the chilled base into a shallow dish and freeze, stirring vigorously every 30 minutes for 2-3 hours. This breaks up ice crystals for smoother results.
Why is my ice cream icy?
Icy texture usually means too much water in the base. Ensure you’re using full-fat dairy and proper proportions. Adding 1 tablespoon corn syrup or alcohol helps prevent large crystals.
How long does homemade ice cream last?
Properly stored, it maintains best quality for 1-2 weeks. After that, texture may suffer though it’s still safe to eat. Commercial stabilizers help store-bought versions last longer.
Can I use vanilla extract instead of beans?
Yes, substitute 1 tablespoon pure vanilla extract per bean. Add it after cooking to preserve volatile flavor compounds. The taste will be slightly different but still delicious.
Additional Resources
Explore our other frozen dessert recipes like chocolate gelato or strawberry sorbet. For technique help, see our guide to perfect custards. Learn more about vanilla varieties in our ingredient spotlight series.
Recommended equipment includes a reliable ice cream maker with compressor or pre-freezable bowl, quality vanilla beans from reputable sources, and accurate thermometers for perfect custard every time.
Join the Conversation
Share your homemade vanilla ice cream creations with #PerfectVanillaIceCream. We love seeing your variations and presentations. Leave a comment with your favorite way to enjoy this classic dessert!
Have a special twist on this recipe? Submit your version for possible feature in our reader spotlight. Your culinary creativity inspires our community of dessert lovers.
The Recipe
Homemade Vanilla Ice Cream
Serves: 6
Prep Time: 15 mins
Cook Time: 10 mins
Total Time: 25 mins + chilling
Kitchen Equipment Needed
- Medium saucepan
- Mixing bowls
- Whisk
- Fine mesh strainer
- Ice cream maker
- Airtight freezer container
Ingredients
- 2 cups heavy cream
- 1 cup whole milk
- 3/4 cup granulated sugar
- 1 vanilla bean, split and scraped (or 1 tbsp vanilla bean paste)
- Pinch of salt
- 6 large egg yolks
- 1 tsp pure vanilla extract
Directions
- In a medium saucepan, combine cream, milk, half the sugar, vanilla bean seeds and pod, and salt. Heat over medium until steaming but not boiling, about 5 minutes.
- Meanwhile, whisk egg yolks with remaining sugar until pale and slightly thickened.
- Slowly pour about 1 cup of the hot cream mixture into the yolks, whisking constantly. Then pour everything back into the saucepan.
- Cook over medium-low heat, stirring constantly, until mixture thickens enough to coat the back of a spoon (170-175°F).
- Strain through a fine mesh sieve into a clean bowl. Stir in vanilla extract.
- Cool to room temperature, then cover and refrigerate at least 4 hours, preferably overnight.
- Churn in ice cream maker according to manufacturer’s instructions (about 20-25 minutes).
- Transfer to airtight container and freeze until firm, about 4 hours.
Recipe Notes
- For extra vanilla flavor, steep the pod in the cream mixture for 30 minutes before heating.
- If ice cream becomes too hard in freezer, let sit at room temperature 10 minutes before serving.
- Add mix-ins like chocolate chips or cookie pieces during last 5 minutes of churning.


