Mini Chocolate Pie Recipe: The Ultimate Easy Chocolate Dessert
If you’re looking for a quick, indulgent dessert that satisfies your chocolate cravings, this mini chocolate pie recipe is your answer. Perfect for any occasion, these mini pies are rich, creamy, and incredibly easy to make. Whether you’re hosting a dinner party or simply treating yourself, this dessert is sure to impress. The combination of a buttery crust and a velvety chocolate filling creates a harmonious balance of textures and flavors that will leave everyone asking for seconds.
The beauty of this recipe lies in its simplicity. With just a handful of ingredients and minimal prep time, you can whip up a batch of these decadent mini chocolate pies in no time. The recipe is beginner-friendly, making it ideal for those new to baking or anyone short on time. Plus, the individual servings make it perfect for portion control—though you might find it hard to stop at just one!
Quick Recipe Highlights
- Flavor Profile: Rich, chocolatey, and slightly sweet with a hint of vanilla.
- Texture: Creamy filling paired with a crisp, buttery crust.
- Aroma: Warm, inviting chocolate scent with a touch of vanilla.
- Visual Appeal: Elegant mini pies with a glossy chocolate finish.
- Skill Level Needed: Perfect for beginners—no advanced techniques required.
- Special Equipment: Mini pie tins or a muffin tin.
Recipe Overview
- Difficulty Level: This recipe is beginner-friendly, requiring only basic baking skills and minimal equipment.
- Category: Dessert, perfect for any meal or occasion.
- Cuisine: A classic American dessert with universal appeal.
- Cost: Budget-friendly, using pantry staples like chocolate, butter, and flour.
- Season: Great year-round, but especially comforting during colder months.
- Occasion: Ideal for holidays, parties, or a cozy night in.
Why You’ll Love This Recipe
This mini chocolate pie recipe is a crowd-pleaser for so many reasons. First, the taste is unbeatable—rich, chocolatey, and perfectly balanced with a hint of sweetness. The creamy filling melts in your mouth, while the buttery crust adds a satisfying crunch. It’s a dessert that feels indulgent without being overly heavy.
Second, the convenience of this recipe is a game-changer. With just 15 minutes of prep time and 20 minutes of baking, you can have a dessert that looks and tastes like it came from a professional bakery. It’s perfect for last-minute guests or when you need a quick treat to satisfy your sweet tooth.
Nutritionally, this dessert can be enjoyed in moderation as part of a balanced diet. Dark chocolate, a key ingredient, is packed with antioxidants and can even boost your mood. Plus, the mini portions help with portion control, so you can indulge without overdoing it.
Socially, these mini chocolate pies are a hit at gatherings. Their individual servings make them easy to share, and their elegant presentation adds a touch of sophistication to any table. Whether it’s a holiday party or a casual get-together, these pies are sure to impress.
Finally, this recipe is cost-effective and accessible. Most of the ingredients are pantry staples, and you don’t need any fancy equipment to make them. It’s a dessert that delivers maximum flavor with minimal effort and expense.
Historical Background and Cultural Significance
The origins of chocolate pie can be traced back to the early 20th century in the United States, where it became a staple in Southern cuisine. Known for its rich, creamy filling and flaky crust, chocolate pie quickly gained popularity as a comforting dessert that could be enjoyed year-round. Over time, variations of the recipe emerged, including the mini version, which became a favorite for its individual servings and elegant presentation.
Culturally, chocolate pie holds a special place in American dessert traditions. It’s often associated with family gatherings, holidays, and celebrations. The mini chocolate pie, in particular, has become a modern twist on the classic, offering a convenient and visually appealing option for today’s busy lifestyles.
The evolution of this recipe reflects broader trends in baking, where convenience and presentation are prioritized without sacrificing flavor. Today, mini chocolate pies are enjoyed worldwide, with regional adaptations that incorporate local ingredients and flavors.
Ingredient Deep Dive
Chocolate
Chocolate is the star of this recipe, providing the rich, indulgent flavor that makes these mini pies so irresistible. Opt for high-quality dark or semi-sweet chocolate for the best results. Dark chocolate is packed with antioxidants and has a lower sugar content, making it a slightly healthier option. Store chocolate in a cool, dry place to prevent it from melting or developing a white bloom.
Butter
Butter adds richness and flavor to both the crust and the filling. Unsalted butter is recommended to control the saltiness of the recipe. For the best texture, use cold butter for the crust and softened butter for the filling. Store butter in the refrigerator, and bring it to room temperature before using.
Flour
All-purpose flour is used for the crust, providing structure and a tender crumb. Be sure to measure your flour accurately to avoid a dense or dry crust. Store flour in an airtight container in a cool, dry place to keep it fresh.
Sugar
Granulated sugar sweetens the filling, balancing the bitterness of the chocolate. You can adjust the amount of sugar to suit your taste preferences. Store sugar in an airtight container to prevent it from clumping.
Eggs
Eggs act as a binding agent in the filling, giving it a smooth, creamy texture. Use fresh eggs for the best results, and store them in the refrigerator.
Common Mistakes to Avoid
- Overbaking the crust: This can make it dry and crumbly. Bake just until golden brown.
- Using low-quality chocolate: The flavor of the pie depends on the quality of the chocolate. Invest in good-quality chocolate for the best results.
- Not chilling the dough: Chilling the dough before baking helps prevent shrinkage and ensures a flaky crust.
- Overmixing the filling: Overmixing can incorporate too much air, leading to a less smooth texture.
- Skipping the vanilla extract: Vanilla enhances the chocolate flavor. Don’t skip it!
- Using warm ingredients: Cold butter is essential for a flaky crust, while room-temperature eggs blend better into the filling.
- Not letting the pies cool: Allow the pies to cool completely before serving to let the filling set.
- Overfilling the crust: Leave some room for the filling to expand during baking.
Essential Techniques
Blind Baking
Blind baking the crust ensures it stays crisp and doesn’t become soggy from the filling. To blind bake, line the crust with parchment paper and fill it with pie weights or dried beans. Bake until the edges are set, then remove the weights and finish baking.
Tempering Chocolate
Tempering chocolate ensures a smooth, glossy finish. Melt the chocolate gently over a double boiler, stirring constantly to prevent burning. Once melted, remove from heat and let it cool slightly before using.
Whisking Eggs
Whisking the eggs thoroughly into the filling ensures a smooth, creamy texture. Be sure to whisk until fully incorporated, but avoid overmixing to prevent air bubbles.
Pro Tips for Perfect Mini Chocolate Pies
- Use a food processor to make the crust dough quickly and evenly.
- Chill the dough for at least 30 minutes before rolling it out to prevent shrinkage.
- Brush the crust with egg wash for a golden, shiny finish.
- Let the pies cool completely before serving to allow the filling to set.
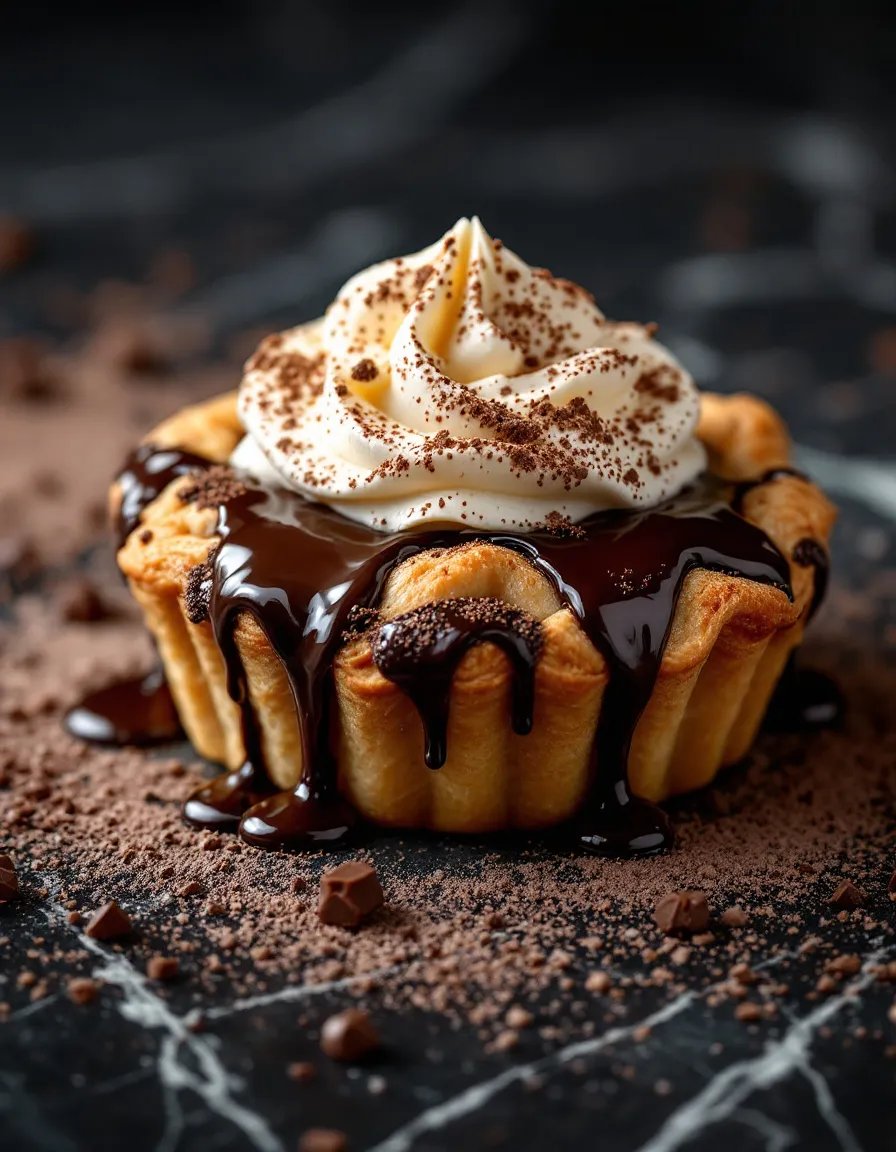
- Garnish with whipped cream, fresh berries, or a dusting of cocoa powder for extra flair.
- Use a piping bag to fill the crusts neatly and avoid spills.
- Store leftovers in an airtight container in the refrigerator for up to 3 days.
Variations and Adaptations
Regional Variations
In the South, chocolate pie is often made with a meringue topping instead of whipped cream. For a twist, try adding a layer of caramel or peanut butter to the filling.
Seasonal Adaptations
Add a touch of peppermint extract during the holidays for a festive flavor. In the summer, top with fresh berries for a refreshing contrast.
Dietary Modifications
For a gluten-free version, use a gluten-free flour blend for the crust. For a vegan option, substitute coconut oil for butter and use a plant-based milk.
Serving and Presentation Guide
Serve these mini chocolate pies at room temperature for the best texture. Garnish with a dollop of whipped cream, a sprinkle of cocoa powder, or a few fresh berries for a pop of color. For a more elegant presentation, drizzle with melted chocolate or caramel sauce.
Wine and Beverage Pairing
Pair these mini chocolate pies with a glass of red wine, such as Cabernet Sauvignon or Merlot, for a sophisticated dessert experience. For a non-alcoholic option, try a cup of dark roast coffee or a rich hot chocolate.
Storage and Shelf Life
Store the mini chocolate pies in an airtight container in the refrigerator for up to 3 days. To freeze, wrap each pie individually in plastic wrap and place in a freezer-safe container. Thaw in the refrigerator before serving.
Make Ahead Strategies
Prepare the crust and filling up to 2 days in advance. Store the crust in the refrigerator and the filling in an airtight container. Assemble and bake just before serving for the freshest results.
Scaling Instructions
To double or triple the recipe, simply multiply the ingredients by the desired factor. Be sure to adjust baking times accordingly and use multiple baking sheets if needed.
Nutritional Deep Dive
Each mini chocolate pie contains approximately 250 calories, with a balance of carbohydrates, fats, and proteins. Dark chocolate provides antioxidants, while the eggs offer a good source of protein. Enjoy in moderation as part of a balanced diet.
Dietary Adaptations
Gluten-Free
Use a gluten-free flour blend for the crust and ensure all other ingredients are gluten-free.
Dairy-Free
Substitute coconut oil for butter and use a plant-based milk in the filling.
Vegan
Use vegan butter, plant-based milk, and a flax egg (1 tbsp ground flaxseed + 3 tbsp water) as a binder.
Troubleshooting Guide
Texture Issues
If the filling is too runny, it may not have set properly. Chill the pies longer before serving.
Flavor Balance
If the pie is too sweet, reduce the sugar in the filling. If it’s too bitter, use a sweeter chocolate.
Temperature Problems
Ensure the oven is fully preheated before baking to avoid undercooked crusts.
Recipe Success Stories
Many home bakers have shared their success with this recipe, praising its simplicity and delicious results. One reader added a layer of salted caramel for an extra indulgent twist, while another used white chocolate for a different flavor profile.
Frequently Asked Questions
Can I use milk chocolate instead of dark chocolate?
Yes, but the filling will be sweeter. Adjust the sugar accordingly.
Can I make these pies ahead of time?
Yes, prepare the crust and filling up to 2 days in advance and assemble before baking.
How do I prevent the crust from shrinking?
Chill the dough before baking and use pie weights during blind baking.
Additional Resources
For more dessert inspiration, check out our recipes for classic chocolate mousse, flourless chocolate cake, and chocolate lava cakes. These recipes are perfect for any chocolate lover and pair beautifully with our mini chocolate pies.
Join the Conversation
We love hearing from our readers! Share your mini chocolate pie creations on social media using the hashtag #MiniChocolatePie. Don’t forget to tag us for a chance to be featured on our page. Happy baking!
The Recipe
Mini Chocolate Pie
Serves: 6 mini pies
Prep Time: 15 mins
Cook Time: 20 mins
Total Time: 35 mins
Kitchen Equipment Needed
- Mini pie tins or muffin tin
- Mixing bowls
- Whisk
- Rolling pin
- Parchment paper
- Pie weights or dried beans
Ingredients
- 1 1/4 cups all-purpose flour
- 1/2 cup unsalted butter, cold
- 1/4 cup granulated sugar
- 1/4 tsp salt
- 1/4 cup ice water
- 1 cup dark chocolate, chopped
- 1/2 cup heavy cream
- 1/4 cup granulated sugar
- 2 large eggs
- 1 tsp vanilla extract
Directions
- Preheat the oven to 375°F (190°C).
- In a food processor, combine flour, sugar, and salt. Add cold butter and pulse until the mixture resembles coarse crumbs.
- Gradually add ice water, pulsing until the dough comes together. Shape into a disk, wrap in plastic, and chill for 30 minutes.
- Roll out the dough and press into mini pie tins. Line with parchment paper and fill with pie weights. Blind bake for 10 minutes, then remove weights and bake for another 5 minutes.
- In a saucepan, heat heavy cream until simmering. Remove from heat and add chocolate, stirring until smooth. Let cool slightly.
- Whisk together eggs, sugar, and vanilla. Gradually whisk in the chocolate mixture.
- Pour the filling into the crusts and bake for 15-20 minutes, until set.
- Let cool completely before serving.
Recipe Notes
- For a gluten-free version, use a gluten-free flour blend.
- Store leftovers in the refrigerator for up to 3 days.