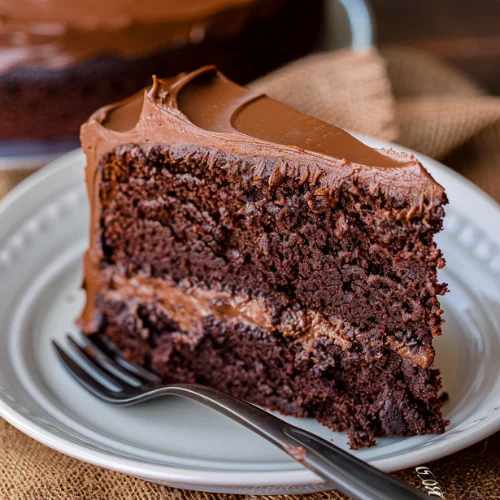
Craving a slice of heaven but intimidated by complex recipes? Look no further! This guide will walk you through creating a simple chocolate layer cake with frosting that rivals any bakery masterpiece. Whether you’re a novice baker or just short on time, our foolproof method ensures a moist, rich, and utterly irresistible dessert. Get ready to impress your friends, family, and even yourself with this easy-to-follow recipe that delivers big on flavor without the fuss.
- The Perfect Foundation: Choosing Your Ingredients
The secret to an exceptional chocolate layer cake starts with quality ingredients. Opt for unsweetened cocoa powder for a deep, intense chocolate flavor. Use room temperature eggs and butter for better incorporation and a smoother batter. For the frosting, high-quality butter and pure vanilla extract will elevate the taste to new heights.
FAQ: Can I use Dutch-process cocoa instead of regular cocoa powder? Answer: While Dutch-process cocoa can work, it may affect the cake’s rise. Stick to regular unsweetened cocoa powder for best results in this recipe.
- Mixing Magic: The Key to a Moist Crumb
Achieving that coveted moist texture is easier than you think. The trick? Don’t overmix! Combine your dry and wet ingredients just until they’re incorporated. Overmixing can lead to a tough, dry cake. Also, consider adding a dollop of sour cream or Greek yogurt to your batter – this secret ingredient boosts moisture and adds a subtle tang that complements the chocolate beautifully.
- Layer Love: Perfecting Your Cake Stacks
For even layers, use a kitchen scale to divide your batter equally between pans. If you don’t have one, an ice cream scoop works wonders for consistent portioning. Once baked, let your layers cool completely before frosting to prevent a melty mess.
FAQ: How do I prevent my layers from sticking to the pan? Answer: Line the bottom of your pans with parchment paper and grease the sides well. This foolproof method ensures easy release every time.
- Frosting Finesse: Whipping Up Silky Smoothness
The frosting can make or break your cake. For a velvety texture, start with softened butter and beat it until it’s light and fluffy before adding other ingredients. Gradually mix in powdered sugar to avoid a sugary explosion in your kitchen. For a richer flavor, try incorporating melted chocolate into your buttercream.
- Assembly Tricks: Building Your Masterpiece
When it comes to assembling your cake, a turntable is your best friend. It allows for smooth, even frosting application. Start with a crumb coat – a thin layer of frosting that seals in stray crumbs. Chill this layer before applying your final coat for a polished look.
FAQ: How can I get perfectly smooth frosting? Answer: After applying your frosting, use a bench scraper held at a 45-degree angle to the cake while slowly rotating your turntable. This technique creates that coveted smooth finish.
- Decorating Delights: Adding Your Personal Touch
Now’s the time to let your creativity shine! Whether you prefer a rustic naked cake look or want to try your hand at piping rosettes, the possibilities are endless. Chocolate shavings, fresh berries, or even edible flowers can take your cake from great to spectacular.
- Serving Suggestions: Maximizing Flavor
For the best flavor, let your cake come to room temperature before serving. This allows the frosting to soften slightly and the cake’s flavors to fully develop. Pair with a scoop of vanilla ice cream or a dollop of whipped cream for an extra indulgent treat.
FAQ: How long can I store this cake? Answer: Properly stored in an airtight container, your cake will stay fresh at room temperature for 3-4 days, or up to a week in the refrigerator.
Conclusion:
Creating a simple chocolate layer cake with frosting doesn’t have to be a daunting task. With these seven steps, you’re well on your way to baking success. Remember, practice makes perfect, so don’t be discouraged if your first attempt isn’t bakery-window worthy. The beauty of homemade cakes lies in their uniqueness and the love baked into every layer. So preheat that oven, grab your mixing bowls, and get ready to indulge in a slice of chocolate heaven. Happy baking!
