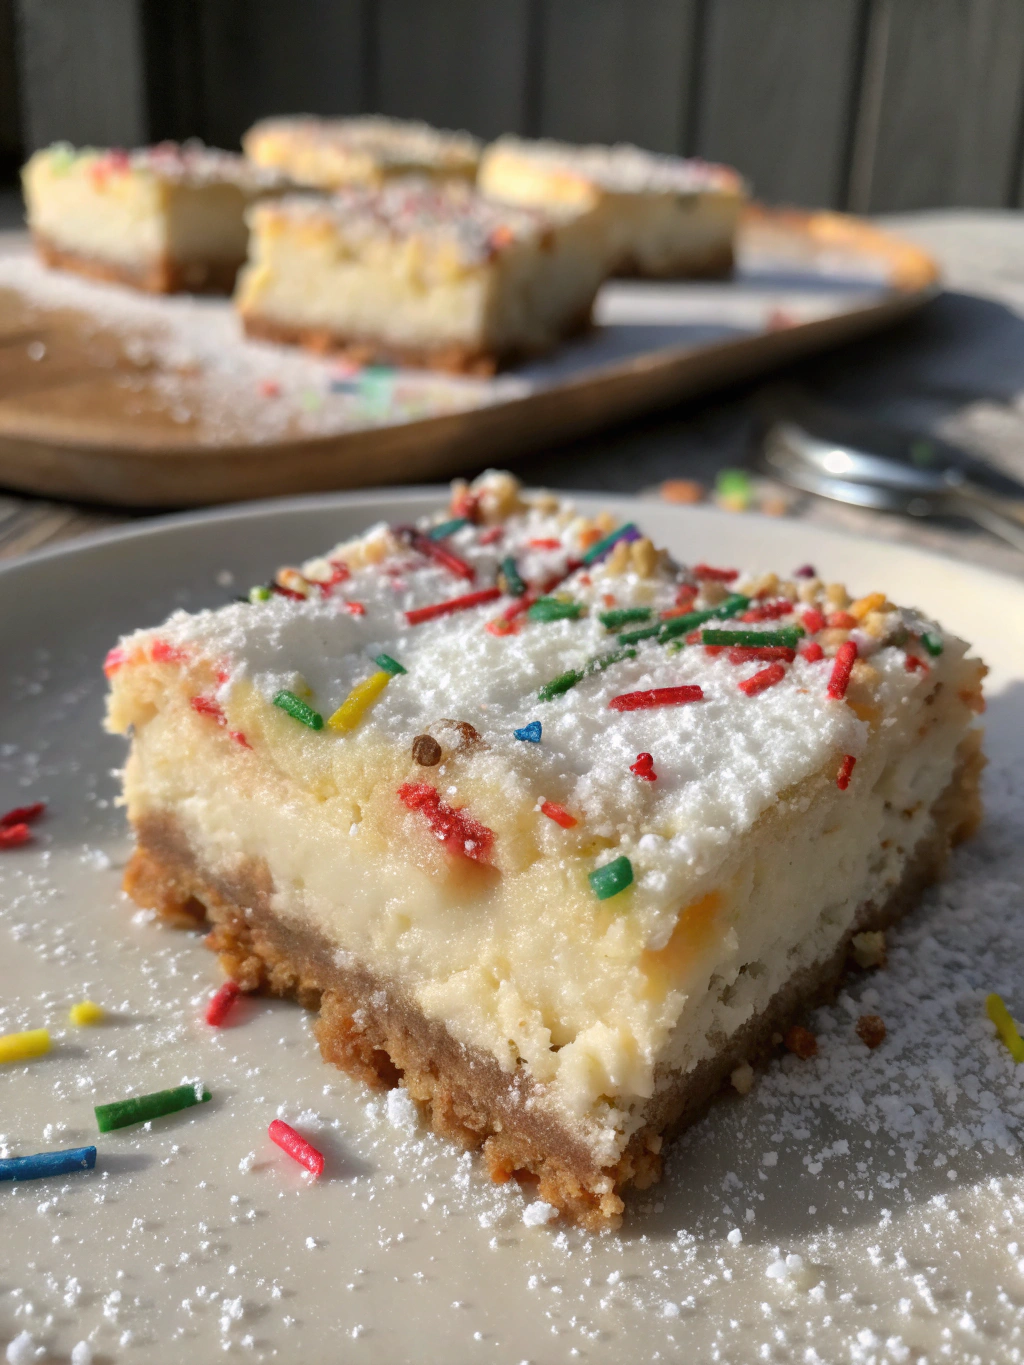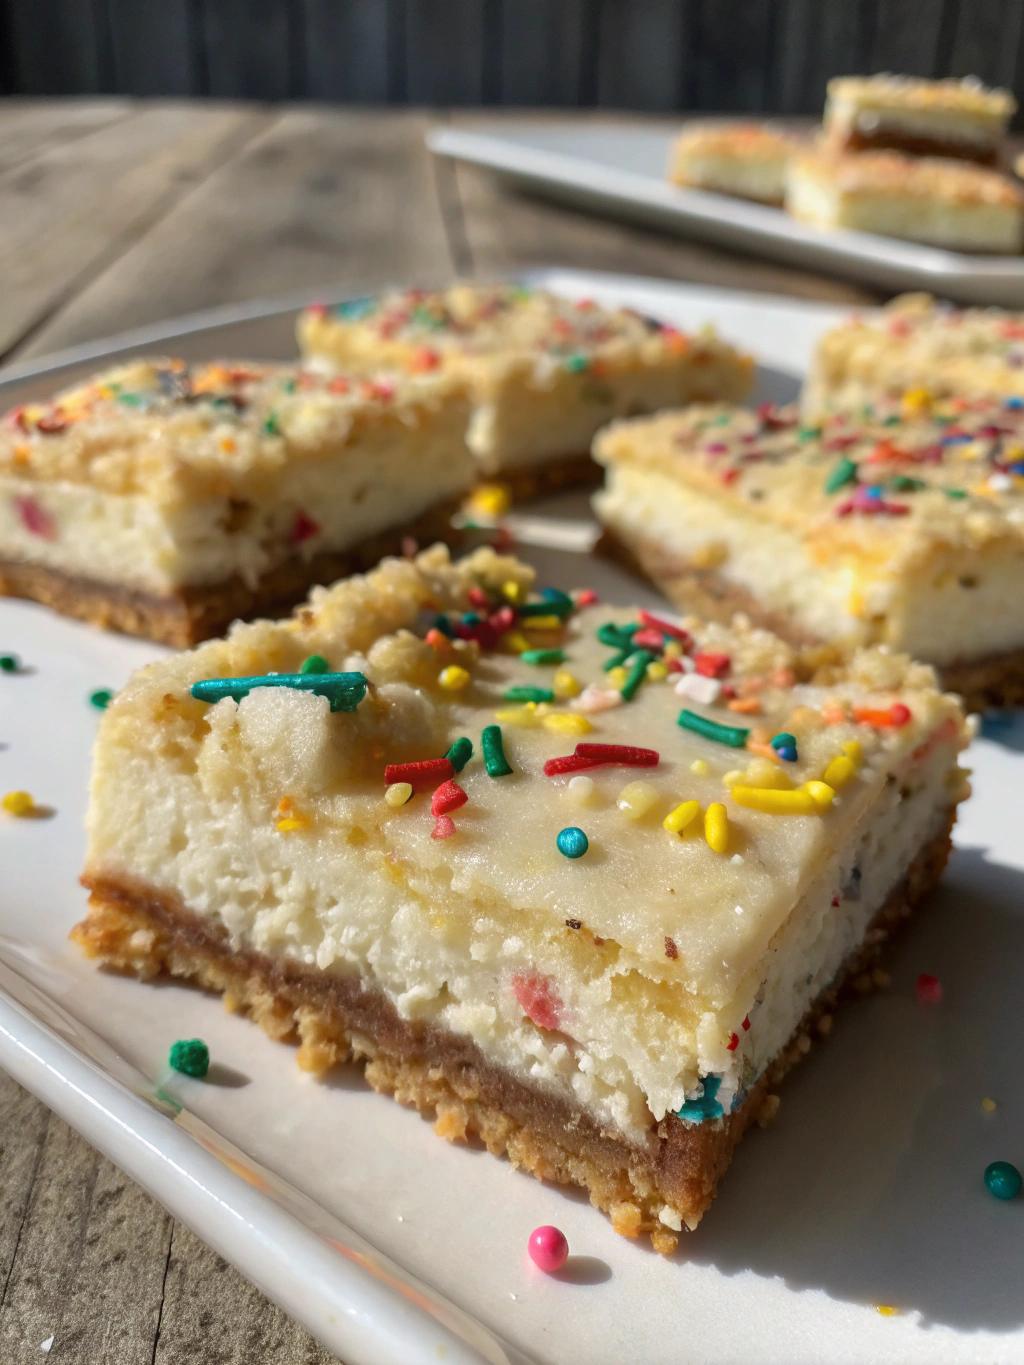
There’s something magical about the combination of sugar cookies and cheesecake—it’s like two childhood favorites decided to throw a party together. I first stumbled upon this idea when I had a craving for something sweet but couldn’t decide between a buttery sugar cookie or a creamy slice of cheesecake. Why not both? The result was these dreamy Sugar Cookie Cheesecake Bars, a dessert so indulgent it feels like a hug in every bite. Perfect for potlucks, holiday gatherings, or just a cozy night in with a cup of tea, these bars are sure to become a fast favorite.
Ingredients You’ll Need
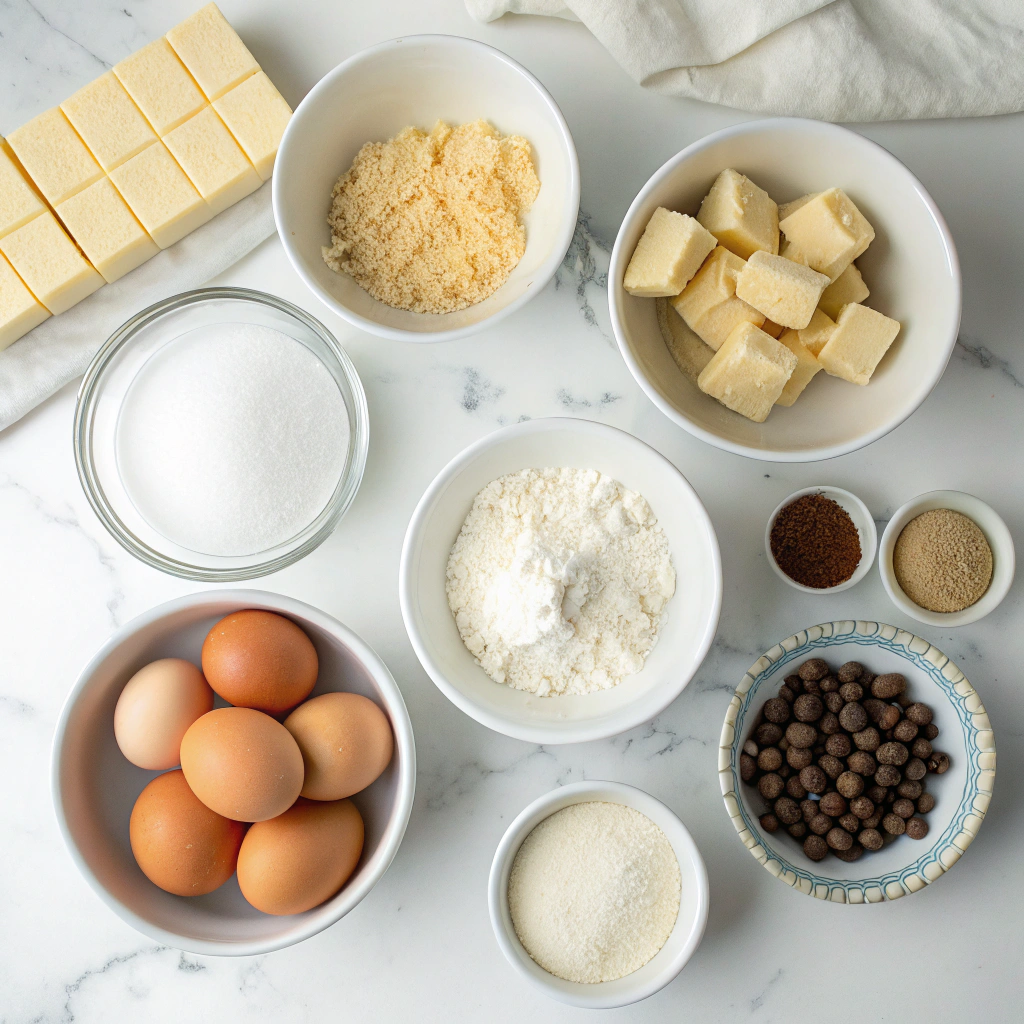
Before we dive into the recipe, let’s gather our ingredients. I love using simple, pantry-friendly items for this recipe—nothing too fussy, just pure deliciousness.
- For the Sugar Cookie Layer:
- 1 cup (2 sticks) unsalted butter, softened (because everything starts with butter, right?)
- 1 cup granulated sugar (for that classic sweetness)
- 1 large egg (room temperature works best for even mixing)
- 1 tsp vanilla extract (the good stuff—it makes a difference!)
- 2 ½ cups all-purpose flour (measured correctly—fluff, spoon, and level!)
- ½ tsp baking powder (for a little lift)
- ½ tsp salt (to balance the sweetness)
- For the Cheesecake Layer:
- 16 oz cream cheese, softened (full-fat for the creamiest texture)
- ½ cup granulated sugar (just enough to sweeten without overpowering)
- 1 large egg (again, room temperature is key)
- 1 tsp vanilla extract (because vanilla and cheesecake are soulmates)
- ½ cup sour cream (for that tangy, velvety finish)
Step-by-Step Instructions
Now, let’s bring these bars to life! Don’t worry—this recipe is as easy as it is delicious.
- Preheat and Prep: Preheat your oven to 350°F (175°C) and line a 9×13-inch baking pan with parchment paper, leaving some overhang for easy removal later. Trust me, this step saves so much frustration!
- Make the Sugar Cookie Dough: In a large bowl, cream together the softened butter and sugar until light and fluffy. Add the egg and vanilla, mixing until just combined. In another bowl, whisk together the flour, baking powder, and salt. Gradually add the dry ingredients to the wet, mixing until a soft dough forms. Press about two-thirds of the dough evenly into the bottom of your prepared pan—this will be your base layer.
- Whip Up the Cheesecake Filling: In a clean bowl, beat the cream cheese and sugar until smooth. Add the egg and vanilla, mixing well, then fold in the sour cream. Pour this luscious filling over the sugar cookie layer, spreading it evenly with a spatula.
- Top It Off: Take the remaining sugar cookie dough and crumble it over the cheesecake layer. Don’t worry about perfection—rustic crumbs add charm! Bake for 30–35 minutes, or until the edges are golden and the center is just set (a slight wobble is okay—it’ll firm up as it cools).
- Cool and Slice: Let the bars cool completely in the pan before transferring to the fridge to chill for at least 2 hours. This patience-testing step ensures clean slices and the perfect texture. Once chilled, lift the bars out using the parchment paper and cut into squares.
And there you have it—a dessert that’s equal parts nostalgic and irresistible. But wait, there’s more! Let’s talk about ways to make these bars your own.
There’s something undeniably magical about the combination of buttery sugar cookies and creamy cheesecake. These Sugar Cookie Cheesecake Bars are the perfect treat for any occasion—whether you’re hosting a holiday gathering, celebrating a birthday, or simply indulging in a sweet afternoon pick-me-up. The best part? They’re surprisingly easy to make, with a soft sugar cookie base, a velvety cheesecake filling, and a sprinkle of festive toppings to make them extra special.
Pro Tips, Variations, and Substitutions
Want to make these bars even more irresistible? Here are a few ways to customize them:
- Add a swirl: Before baking, drizzle melted white or dark chocolate over the cheesecake layer and use a toothpick to create a marbled effect.
- Festive sprinkles: Mix in colorful sprinkles with the sugar cookie dough or sprinkle them on top before baking for a fun pop of color.
- Citrus twist: Add a teaspoon of lemon or orange zest to the cheesecake filling for a bright, refreshing flavor.
- Gluten-free option: Swap the all-purpose flour in the sugar cookie base for a 1:1 gluten-free flour blend.
- Dairy-free version: Use dairy-free cream cheese and butter alternatives for a lactose-friendly treat.
What to Serve It With
These bars are delicious on their own, but if you want to take dessert to the next level, try pairing them with:
- A scoop of vanilla bean ice cream for an extra-decadent experience.
- Fresh berries like strawberries or raspberries for a tart contrast.
- A drizzle of caramel or chocolate sauce for added richness.
- A warm cup of coffee or tea to balance the sweetness.
Storage and Reheating Tips
To keep your Sugar Cookie Cheesecake Bars fresh and delicious:
- Room temperature: Store in an airtight container at room temperature for up to 2 days.
- Refrigerator: For longer storage, keep them in the fridge for up to 5 days.
- Freezer: Wrap individual bars tightly in plastic wrap and freeze for up to 2 months. Thaw in the fridge before serving.
- Reheating: If you prefer them slightly warm, pop a bar in the microwave for 10–15 seconds before enjoying.
Frequently Asked Questions
Can I use store-bought sugar cookie dough?
Absolutely! If you’re short on time, a pre-made sugar cookie dough works just fine. Press it into the pan as directed and proceed with the cheesecake layer.
Why did my cheesecake crack?
Cracks usually happen from overmixing or sudden temperature changes. To prevent this, avoid overbeating the batter and let the bars cool gradually in the oven with the door slightly ajar.
Can I make these bars ahead of time?
Yes! These bars actually taste even better the next day as the flavors meld together. Just store them properly and they’ll be ready when you are.
Can I use a different type of cookie for the base?
Definitely! A graham cracker crust or shortbread crust would also work beautifully with the cheesecake filling.
A Sweet Final Thought
There’s nothing quite like the joy of biting into a dessert that combines two beloved treats into one irresistible bite. These Sugar Cookie Cheesecake Bars are sure to become a staple in your baking repertoire—whether you’re sharing them with loved ones or savoring them all to yourself. So preheat that oven, gather your ingredients, and get ready to bake up a little slice of happiness. Every bite is pure bliss!
PrintSugar Cookie Cheesecake Bars
Description
A delicious dessert combining the flavors of sugar cookies and creamy cheesecake in easy-to-make bars.
Ingredients
For the Crust:
- 1 (16.5 oz) package refrigerated sugar cookie dough
- 2 (8 oz) packages cream cheese, softened
- 1/2 cup granulated sugar
- 2 large eggs
- 1 teaspoon vanilla extract
- 1/2 cup white chocolate chips
Instructions
1. Prepare the Crust:
- Preheat oven to 350°F (175°C). Line a 9×9-inch baking pan with parchment paper.
- Press the sugar cookie dough evenly into the bottom of the prepared pan to form the crust.
- In a large bowl, beat the cream cheese and sugar until smooth. Add eggs one at a time, then mix in vanilla.
- Pour the cheesecake mixture over the sugar cookie crust. Sprinkle white chocolate chips on top.
- Bake for 30-35 minutes or until the edges are set and the center is slightly jiggly. Cool completely before cutting into bars.
Notes
You can customize the seasonings to taste.